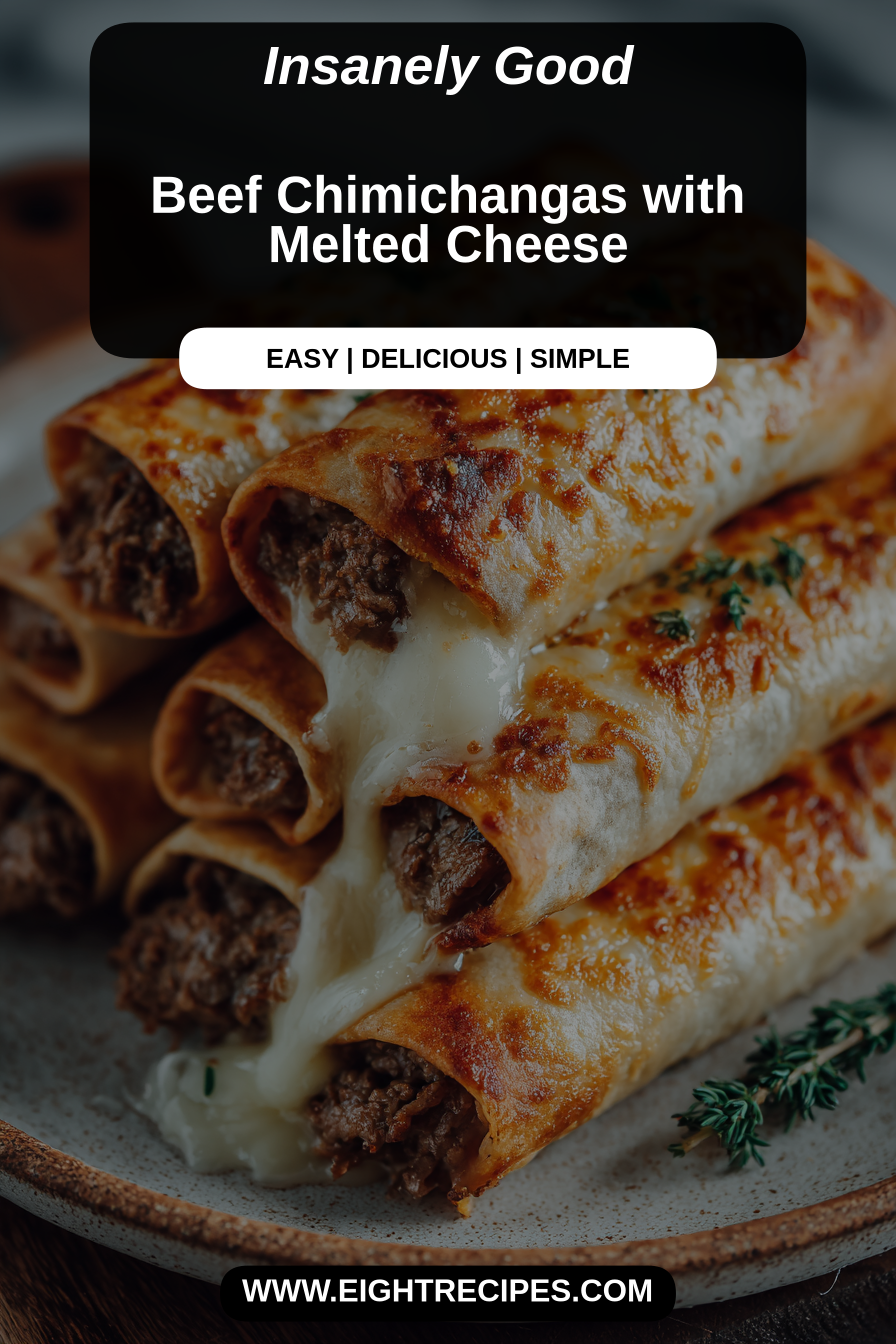
Beef Chimichangas with Melted Cheese
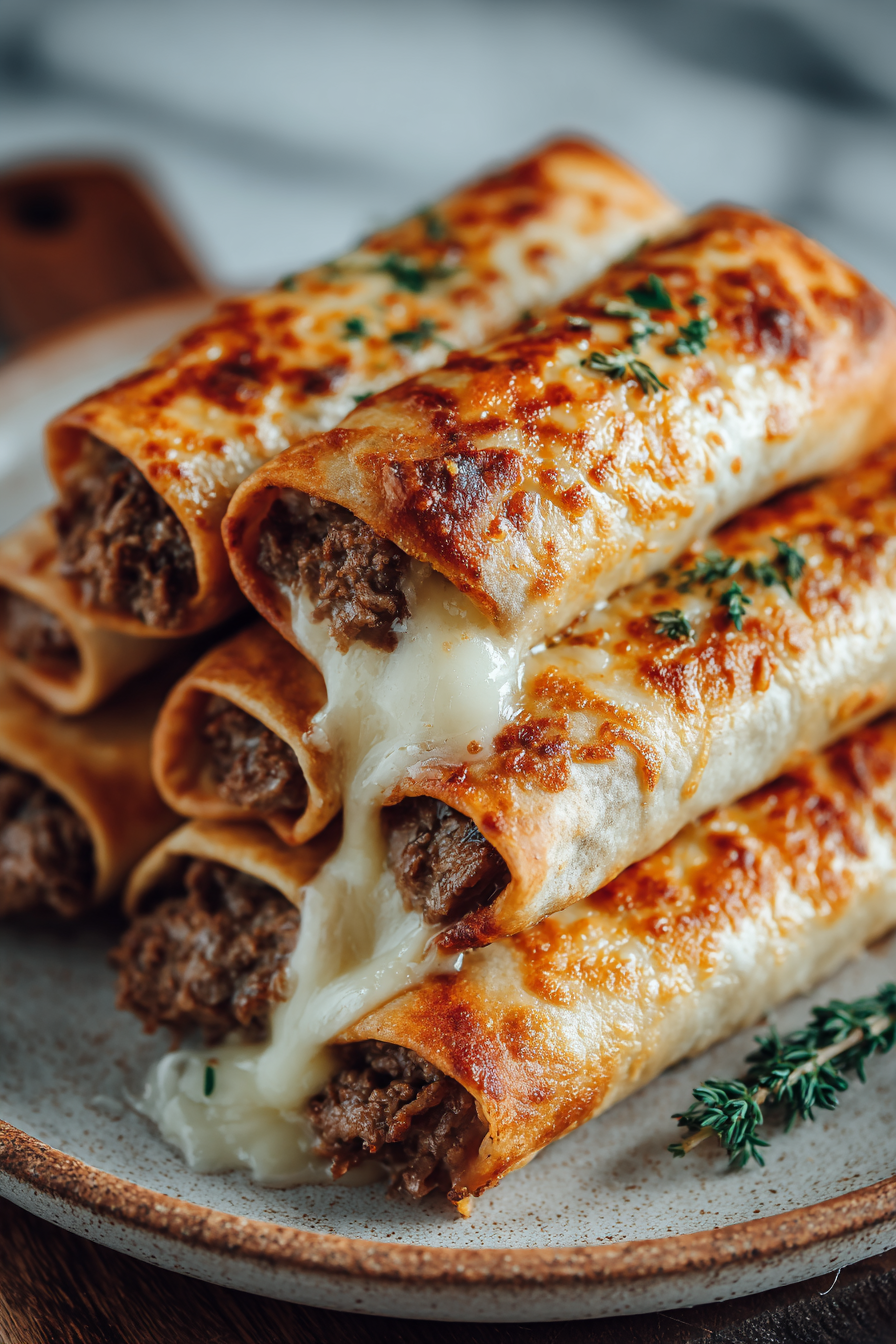
I’ve been making these beef chimichangas with melted cheese for years — they’re crunchy, cheesy, and reliably crowd-pleasing, hitting that comforting crossroads between taco night and something a little more indulgent.
My husband calls these “the best way to eat a taco in blanket form,” which, admittedly, is a very accurate endorsement. Our kiddo literally does a victory dance when I pull a tray of chimichangas from the oven (or out of the shallow fryer on celebratory nights). They’ve become our go-to for game nights and lazy Sundays because they travel well, freeze like a dream, and every bite has that satisfying crisp-then-melty contrast that makes people smile. I’ll never forget the first time I nailed the balance of seasoning and cheese — my mother-in-law asked for the recipe and then tried to steal my plate. That’s when I knew this was a keeper.
Why You’ll Love This Beef Chimichangas with Melted Cheese
– Crispy exterior with a gooey, well-seasoned beef filling — all the best textures in one handheld package.
– Versatile: bake them for a lighter finish or shallow-fry for a classic crunchy edge; both methods deliver great results.
– Pantry-friendly: most of the ingredients are things I always have on hand — ground beef (or shredded), tortillas, cheese, and a few spices.
– Make-ahead friendly: the filling freezes beautifully and you can assemble ahead for quick weeknight dinners.
– Kid-approved and party-ready: they’re perfect for dipping, stacking, or serving with a big bowl of toppings.
Behind the Recipe
This is the kind of recipe that rewards a good foundation: flavorful beef, the right cheese, and a tortilla that stays sturdy once rolled. Over time I learned to cook the beef until it’s slightly caramelized for depth, drain excess grease so the shells don’t get soggy, and let the filling cool a little before wrapping — that helps keep the tortilla intact. For frying, a shallower oil bath gives you the crisp without soaking the chimichanga; for baking, a quick brush of oil and a hot oven create surprisingly even browning. Small things like a light sprinkle of cheese inside to glue the seam and a pinch more seasoning than you think you need make the difference between “nice” and “remember this” chimichangas.
Shopping Tips
– Protein: Choose lean ground beef (85/15 is a good compromise) or use shredded roast beef for more texture; fresher meat makes a noticeable taste difference.
– Cheese: Pick a melting cheese like Monterey Jack, Oaxaca, or a mild cheddar — pre-shredded is fine for convenience, but freshly shredded melts creamier.
– Grains/Pasta: Use large flour tortillas (10–12 inches) so you can wrap without overstuffing; if you need gluten-free, buy sturdy, labeled gluten-free tortillas designed for baking.
– Spices: Stock up on chili powder, cumin, and smoked paprika — fresher spices give a brighter, more aromatic filling.
– Fats & Oils: If frying, use a neutral oil with a high smoke point (canola, vegetable, or peanut); for baking, a light olive oil spray or brush works well.
Prep Ahead Ideas
– Cook and season the beef filling a day or two ahead; store it in an airtight container in the fridge and reheat briefly to thicken any released juices before assembling.
– Shred or grate the cheese ahead of time and keep it in a zip-top bag in the fridge to speed assembly.
– Assemble chimichangas and freeze on a tray until solid, then transfer to a freezer bag — bake or fry from frozen with a few extra minutes.
– Pre-chop any toppings (onions, cilantro, tomatoes) and keep them in small containers so you can set up a quick topping station for assembly night.
Time-Saving Tricks
– Use a single skillet for browning the beef and softening aromatics to cut down on dishes.
– Buy pre-shredded cheese if you’re short on time, or use a food processor to shred in bulk.
– Keep a jar of salsa and a bag of prewashed greens on hand for instant serving options instead of making everything from scratch.
– Mise en place: line up your fillings, cheese, and sauces before you start rolling; it turns assembly into an assembly-line task that’s fast and tidy.
– If you’re baking, preheat the oven well so the chimichangas crisp quickly and don’t dry out while waiting.
Common Mistakes
– Overfilling the tortilla — I did this once and ended up with a tear and a messy pan; use a modest amount of filling and leave a rim to fold.
– Wrapping while the filling is piping hot — that can steam the tortilla and make it soggy; let the filling cool for a few minutes so it sets a bit.
– Using a floppy or thin tortilla — it won’t hold up to frying or heavy fillings; choose sturdier tortillas labeled for burrito or chimichanga use.
– Not draining excess grease — if the beef is greasy, blot it on a paper towel or briefly drain so the shells crisp properly.
– Overcrowding the pan during frying — that lowers oil temperature and yields greasy chimichangas; work in batches for an even crisp.
What to Serve It With
– Classic sides: Spanish rice, refried beans, or a simple cilantro-lime slaw to cut the richness.
– Fresh toppers: pico de gallo, guacamole, sour cream or crema, and lime wedges for bright contrast.
– For a lighter plate: a citrusy green salad with avocado and pickled red onion pairs beautifully.
– Party-style: set out bowls of shredded lettuce, chopped tomatoes, hot sauce, and pickled jalapeños so people can customize.
Tips & Mistakes
If you want extra-crisp chimichangas from the oven, brush them with a little oil and place them seam-side down on a hot baking sheet — flipping halfway makes both sides evenly golden. When frying, don’t crowd the pan and keep the oil between 350–375°F so you get a fast crisp without greasy results.
Storage Tips
Store in airtight containers in the fridge. It reheats beautifully, but if you sneak a bite cold straight from the container, it still works.
Variations and Substitutions
– Meat swaps: Ground turkey or shredded chicken work well if you prefer a lighter protein; just adjust seasoning since turkey is milder.
– Cheese swaps: Try pepper jack for a touch of heat or a mix of cheddar and mozzarella for a balance of flavor and stretch.
– Vegetarian option: Fill with seasoned black beans, sautéed mushrooms, and roasted peppers for a satisfying meat-free version.
– Cooking method: Oven-baked chimichangas are lighter and safer for weeknights; shallow-fry for the authentic crisp when you’re entertaining.
– Sauces: Smoked salsa or a chipotle crema brings a smoky note; keep a classic salsa roja on hand if you want something bright and tomato-forward.