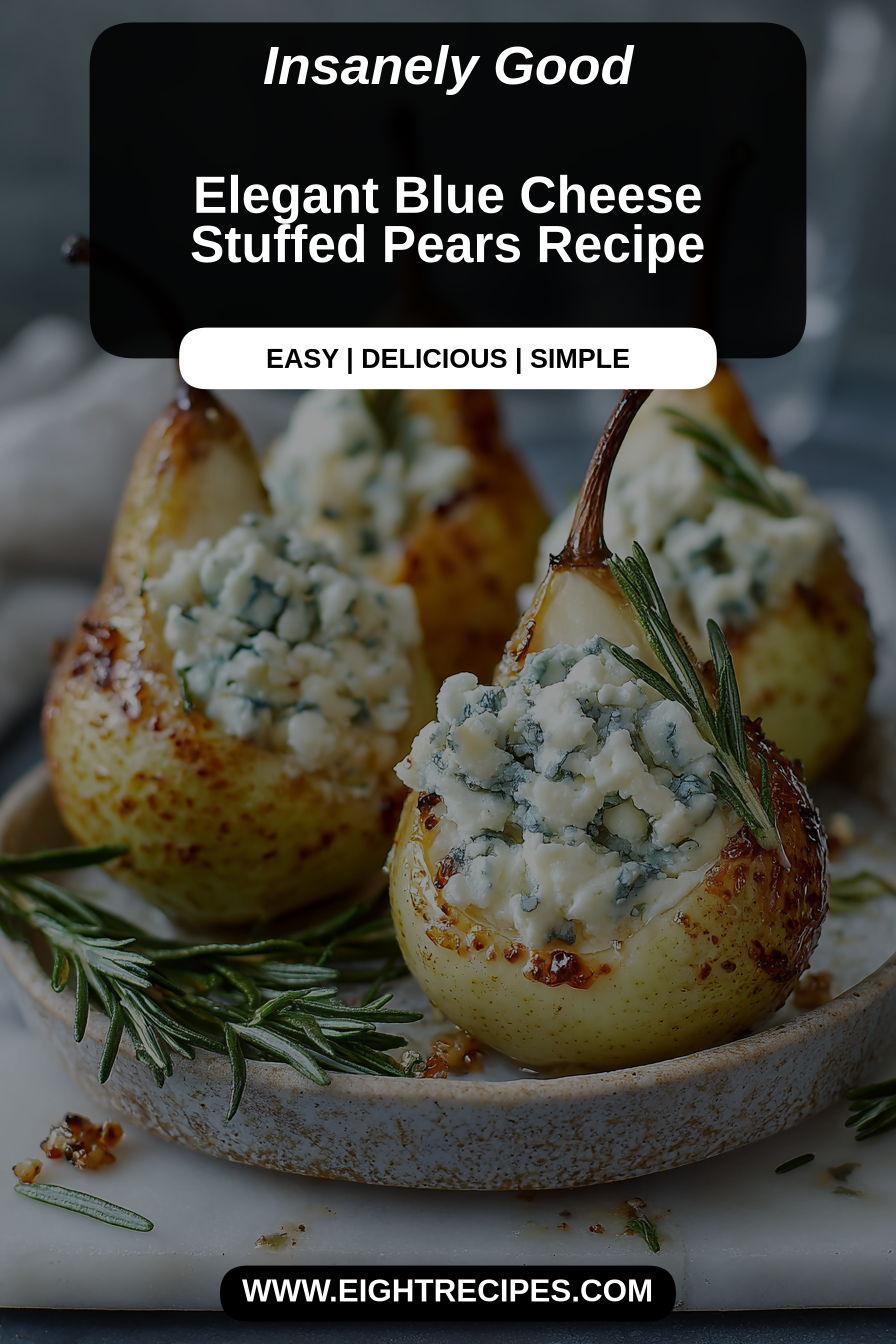
Elegant Blue Cheese Stuffed Pears Recipe
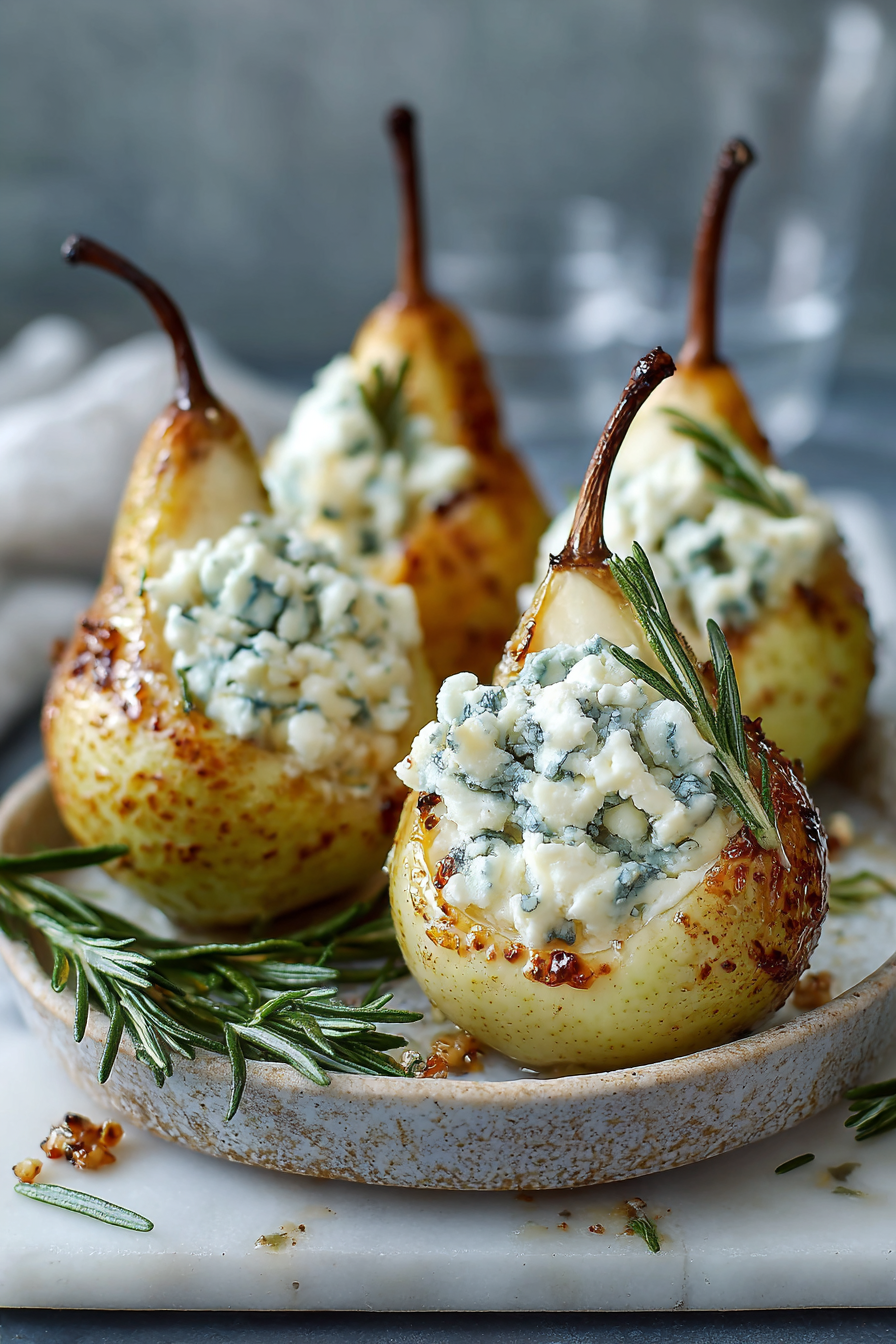
This elegant appetizer marries the natural sweetness of ripe pears with the bold, creamy tang of blue cheese, creating a truly sophisticated bite that’s surprisingly simple to assemble. It’s a dish that feels special enough for a dinner party but is quick enough for a spontaneous indulgence. The contrasting textures and flavors—succulent fruit, crumbly pungent cheese, and the delightful crunch of toasted nuts—make for an irresistible combination that truly sings on the palate.
My husband, Mark, has a refined palate, but he’s also a creature of comfort when it comes to snacks. The first time I made these blue cheese stuffed pears, I was skeptical if he’d even try them. “Fruit and cheese?” he’d asked, giving me *that* look, the one that says, “Are we having dessert before dinner, or…?” But one bite was all it took. The combination of the sweet, juicy pear and the savory, salty blue cheese, all balanced by a drizzle of honey and a scattering of toasted walnuts, completely won him over. Now, it’s his go-to request for any get-together, or even just a quiet Friday night when we want something a little fancy without a lot of fuss. It’s become a beautiful reminder that sometimes the simplest pairings yield the most memorable flavors.
Why You’ll Love This Elegant Blue Cheese Stuffed Pears Recipe
You’ll fall in love with this recipe for its effortless elegance—it looks incredibly impressive but comes together in mere minutes, making you feel like a culinary wizard without the stress. The harmonious blend of sweet, salty, and tangy flavors is truly addictive, offering a sophisticated taste experience that delights the senses. It’s wonderfully versatile, equally at home as an appetizer, a light dessert, or a standout component on a charcuterie board. Plus, with minimal cooking, it’s perfect for warmer months or when you simply prefer not to heat up your kitchen.
Behind the Recipe
What I’ve learned making these at home is that the key to their success really lies in the quality and ripeness of your ingredients. You want pears that are ripe enough to be juicy and fragrant but still firm enough to hold their shape when halved. Too soft, and they’ll be mushy; too hard, and they won’t offer that beautiful tender contrast to the cheese. Another little touch that makes a huge difference is toasting your nuts—it brings out their oils and deepens their flavor profile dramatically, adding a richer crunch. Don’t skip the honey or balsamic glaze; that sweet-tart drizzle is the finishing touch that ties all the flavors together beautifully. I’ve found that even for people who claim not to like blue cheese, pairing it with something sweet and fruity often makes them reconsider!
Shopping Tips
– Produce: Look for pears that are ripe but firm. Give them a gentle squeeze near the stem; they should yield slightly. Anjou, Bosc, or Bartlett pears work wonderfully here for their shape and subtle sweetness.
– Cheese: Select a good quality blue cheese like Gorgonzola, Stilton, or Roquefort. Gorgonzola dolce is a milder, creamier option if you’re not a fan of intensely pungent blues, while Stilton offers a classic sharp, crumbly profile.
– Nuts & Seeds: Walnuts or pecans are excellent choices for their earthy flavor and crunch. Buy them raw and toast them yourself for the best flavor; avoid pre-roasted, salted varieties.
– Sweeteners: A good quality honey, preferably local, will add a beautiful floral sweetness. Maple syrup is also a lovely alternative if you prefer its distinct flavor.
– Crunch Extras: If you want an extra layer of texture, a sprinkle of flaky sea salt (like Maldon) over the finished pears can really enhance the flavors.
– Specialty Item: A balsamic glaze isn’t strictly necessary but adds a fantastic tangy-sweet finish. You can buy it pre-made or easily reduce good quality balsamic vinegar yourself.
Prep Ahead Ideas
You can definitely get a head start on these elegant pears! The day before, toast your walnuts or pecans and let them cool completely before storing them in an airtight container at room temperature. You can also crumble your blue cheese and keep it in a sealed container in the fridge. If you’re making your own balsamic glaze, prepare it and store it at room temperature. On the day of serving, all that’s left is to halve the pears and assemble, making it a breeze for entertaining or a busy weeknight.
Time-Saving Tricks
While this recipe is already quite quick, a few habits can make it even smoother. Ensure your blue cheese is already crumbled or easily crumbled (some softer varieties are easier to manage). Don’t underestimate the power of toasting nuts in a dry pan on the stovetop—it takes just a few minutes, much faster than an oven, and the aroma tells you when they’re ready. Also, have all your components laid out—pears, cheese, nuts, honey, glaze—before you start assembly; this “mise en place” approach means you can create a beautiful plate in under five minutes.
Common Mistakes
A common pitfall with this recipe is using pears that are either too hard or too soft. Overly firm pears lack the necessary sweetness and tender texture, while very ripe, mushy pears won’t hold their shape nicely. Another mistake is forgetting to toast the nuts; raw nuts simply don’t offer the same depth of flavor or satisfying crunch. I once tried to skip the honey thinking the pear was sweet enough, but found the dish really needed that extra drizzle to balance the salty blue cheese. If your blue cheese is too potent for some palates, you can always mix it with a little cream cheese or mascarpone to mellow it out.
What to Serve It With
These elegant blue cheese stuffed pears shine as a sophisticated appetizer alongside a glass of crisp white wine like a Sauvignon Blanc or a light-bodied Pinot Noir. They also make a fantastic addition to a cheese board, complementing other cheeses, crackers, and cured meats beautifully. For a lighter meal, serve them alongside a simple green salad with a vinaigrette. Or, for a unique dessert, present them after dinner with a small scoop of vanilla bean ice cream.
Tips & Mistakes
Storage Tips
Store in airtight containers in the fridge. It reheats beautifully, but if you sneak a bite cold straight from the container, it still works.
Variations and Substitutions
There’s plenty of room to play with this recipe! If blue cheese isn’t your favorite, try a creamy goat cheese or a soft, mild brie. For the nuts, almonds or pistachios would also be delicious if walnuts or pecans aren’t available. Instead of honey, you could drizzle with maple syrup, a fig jam, or even a spiced pear liqueur for an adult twist. For a slightly different flavor profile, you could very lightly roast the pear halves for 5-10 minutes before stuffing, which softens them and brings out more of their natural sugars. While the classic version with blue cheese, walnuts, and honey is truly a winner, don’t be afraid to experiment with what you have on hand.