Easy Make-Ahead Turkey Gravy
Thanksgiving—or any roast dinner, for that matter—just isn’t complete without a rich, velvety gravy. But let’s be honest, trying to whisk up a perfect batch from hot drippings while simultaneously carving a turkey and coordinating a dozen side dishes is a recipe for stress. That’s where this Easy Make-Ahead Turkey Gravy comes in. It’s a game-changer, allowing you to craft a deeply flavorful, silky-smooth gravy days in advance, freeing you up to truly enjoy the moment when the big meal arrives.
My husband, bless his heart, is the self-proclaimed “gravy king” of our house. For years, I watched him meticulously hover over the stove on Thanksgiving morning, trying to coax the perfect consistency from the pan drippings, inevitably ending up with either a lumpy mess or a watery disappointment. One year, I decided enough was enough. I tested this make-ahead method, and the look of pure relief and joy on his face when I told him the gravy was already done, chilling in the fridge, was priceless. Now, it’s not just a staple; it’s a cherished tradition that saves our sanity and ensures every holiday meal is topped with a generous pour of his favorite, perfectly smooth gravy.
Why You’ll Love This Easy Make-Ahead Turkey Gravy
You’ll fall head over heels for this recipe because it takes one of the most stressful last-minute tasks off your plate, literally. Imagine the day of your feast: your turkey is resting, your sides are warming, and instead of battling a hot pan for gravy, you simply pull a container from the fridge and gently reheat. The flavor is incredibly deep and savory, built from roasted turkey parts and aromatic vegetables, giving it a complexity that drippings alone sometimes miss. It’s consistently smooth, never lumpy, and reheats beautifully, making it an absolute lifesaver for holiday hosts who crave both quality and calm.
Behind the Recipe
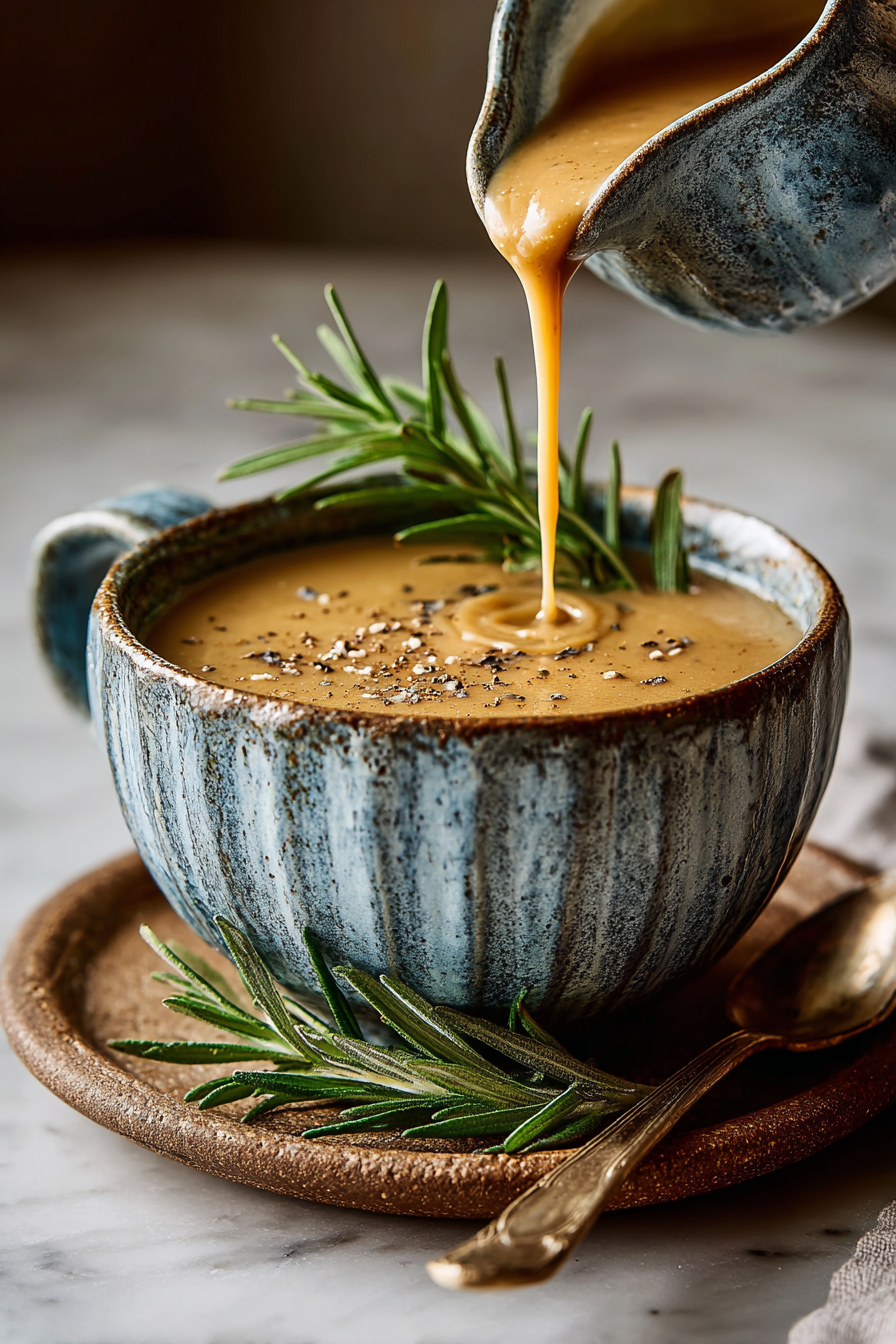
Making a truly exceptional gravy ahead of time starts with building a solid foundation, which means a really good turkey stock. I’ve learned over the years that roasting your turkey wings or necks until they’re deeply caramelized before simmering them with your mirepoix (onions, carrots, celery) makes all the difference in the final flavor profile. Don’t rush that browning step! Another key insight is perfecting the roux—the mixture of fat and flour that thickens the gravy. The trick is to whisk constantly as you cook the flour in butter or turkey fat until it’s lightly golden, ensuring all the flour is incorporated and cooked out to prevent any raw flour taste. A common stumble for many is adding liquid too quickly to the roux, which can lead to lumps. Pour it in gradually, whisking all the while, and you’ll be rewarded with a velvety texture. Finally, seasoning is paramount; taste often and adjust with salt, pepper, and a touch of fresh herbs at the end to really make it sing.
Shopping Tips
– Protein: Look for turkey necks, wings, or giblets (excluding the liver, which can add a bitter note) in the poultry section. These are usually inexpensive and packed with flavor for stock.
– Vegetables: A classic mirepoix of yellow onions, carrots, and celery forms the flavorful base. Opt for firm, fresh vegetables for the best results.
– Fats & Oils: You’ll need unsalted butter for the roux, or save some rendered turkey fat if you happen to have it. Good quality butter makes a difference in richness.
– Baking Basics: All-purpose flour is your go-to for thickening. Ensure it’s fresh from the pantry; old flour can sometimes impart off-flavors.
– Canned Goods: Choose a low-sodium chicken or turkey broth as a backup or to supplement your homemade stock, allowing you to control the final seasoning.
– Fresh Herbs: Sprigs of fresh thyme, sage, and a bay leaf can elevate the aroma and taste. These are often found near other fresh herbs in the produce aisle.
Prep Ahead Ideas
You can get a significant head start on this gravy, making the actual holiday cooking much smoother. The entire gravy can be made up to 3-4 days in advance and stored in an airtight container in the refrigerator. If you prefer to break it down further, you can roast the turkey parts and make the stock a week ahead, freezing the cooled stock until you’re ready to finish the gravy. Chop all your aromatics—onions, carrots, and celery—the day before, keeping them in separate airtight containers in the fridge. This makes the initial sautéing step incredibly quick and helps streamline your active cooking time when you do make the gravy.
Time-Saving Tricks
While this recipe is designed to be made ahead, there are still ways to optimize your time. Don’t be afraid to use a good quality store-bought low-sodium chicken or turkey broth if you’re short on time for making your own stock from scratch; it will still yield a delicious result. When making your roux, keep all your ingredients measured and ready – this is classic mise en place and prevents fumbling. And while it’s tempting to rush, don’t skimp on simmering the gravy once the liquid is added; a gentle simmer for 10-15 minutes helps deepen the flavors and ensures a smooth, consistent texture. Sometimes, slowing down for just a few minutes actually improves the end product.
Common Mistakes
One of the most frequent pitfalls is lumpy gravy, which usually happens when the flour isn’t fully incorporated into the fat before the liquid is added, or if the liquid is added too quickly. To avoid this, whisk the flour into the melted fat until it forms a smooth paste, then slowly pour in your broth while whisking continuously. Another mistake is under-seasoning; gravy needs a good amount of salt and pepper to truly shine, so taste and adjust as you go. Lastly, not cooking the roux long enough can leave you with a raw flour taste; cook it for at least 1-2 minutes until it smells nutty and loses its pasty raw scent. If your gravy ends up too thin, you can simmer it longer to reduce. If it’s too thick, simply whisk in a little more warm broth or water until it reaches your desired consistency.
What to Serve It With
This gravy is destined for your holiday table. It’s the perfect accompaniment to Roasted Turkey, naturally, but also a must-have for Creamy Mashed Potatoes, savory stuffing, and even over your morning-after turkey sandwiches. Don’t limit it just to the holidays; it’s wonderful with any pan-seared chicken or pork loin throughout the year.
Tips & Mistakes
Storage Tips
Store in airtight containers in the fridge. It reheats beautifully, but if you sneak a bite cold straight from the container, it still works.
Variations and Substitutions
While the classic turkey gravy is hard to beat, there are ways to adapt it. For a gluten-free version, swap the all-purpose flour for a cornstarch slurry (1 tablespoon cornstarch mixed with 1 tablespoon cold water) added at the end, or use a gluten-free all-purpose flour blend for the roux. You can deepen the flavor with a splash of dry sherry or white wine added to the pan after sautéing the vegetables and before adding the broth. For an even richer gravy, whisk in a tablespoon of heavy cream or a pat of butter right before serving. Feel free to play with herbs too—rosemary or bay leaf can also contribute beautifully.