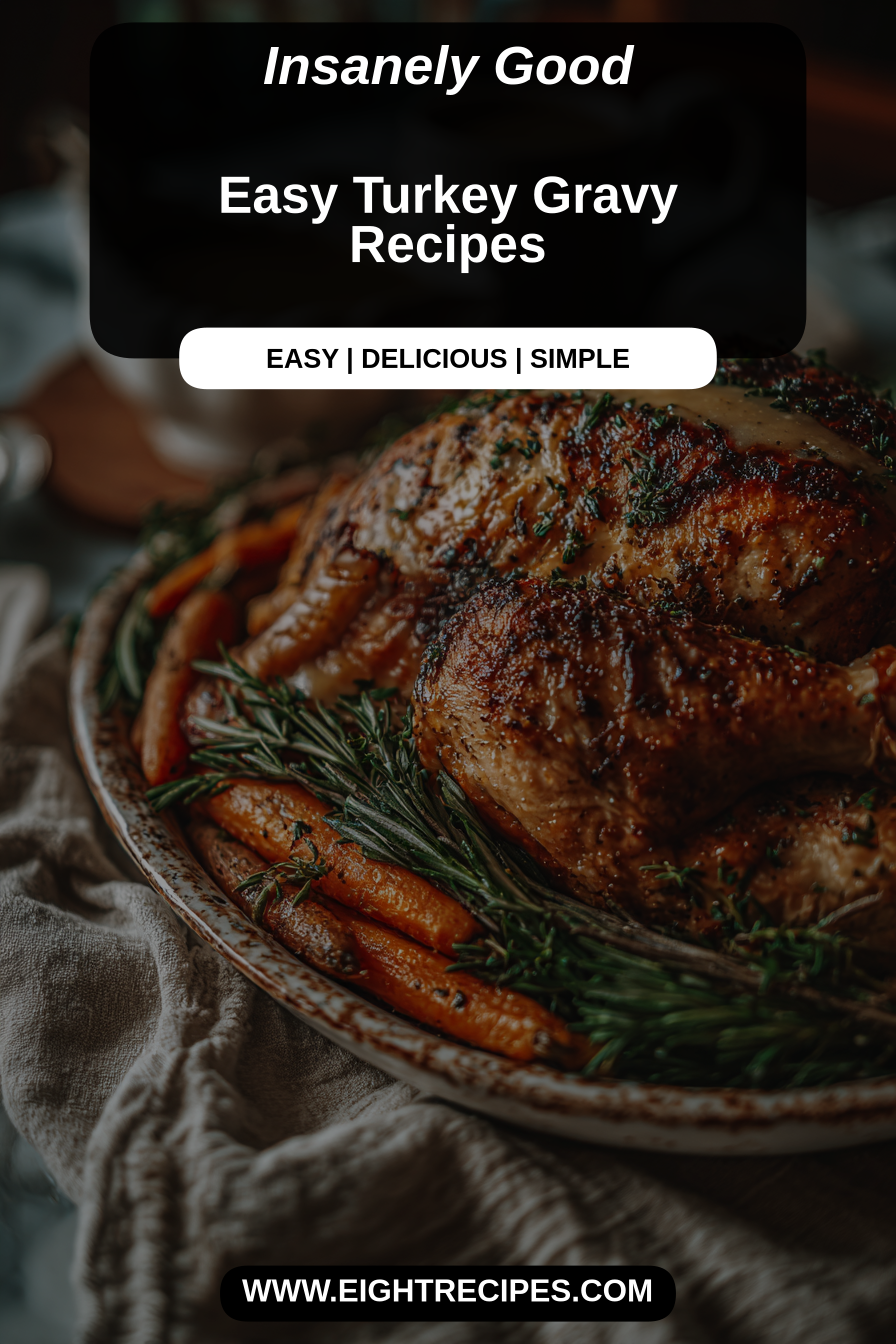
Easy Turkey Gravy Recipes
There are few things as comforting and essential to a holiday feast as a rich, savory turkey gravy. This recipe isn’t just about pouring something over your mashed potatoes; it’s about elevating every bite, tying together all the elements on your plate with a silky, flavorful ribbon. What makes this version stand out is its approachability – it demystifies what many consider a daunting task, guiding you to a lump-free, deeply delicious gravy using those precious pan drippings, ensuring every drop is packed with authentic turkey flavor.
I remember my first few Thanksgivings trying to wrangle a gravy that wasn’t either too thin, too lumpy, or utterly devoid of flavor. It was a culinary challenge, often resulting in a stressed-out me and a less-than-stellar sauce. Then, one year, my husband, ever the calm presence in my kitchen storms, suggested we just slow down, pay attention to the details, and make it together. Since then, making the gravy has become “our thing.” He’s the official deglazer and whisker, and I’m the seasoned taste-tester. Our little one, still too young to help with the hot pan, insists on being the first to try a tiny spoonful over a piece of bread. The moment that perfectly smooth, glossy gravy hits the table, it’s a quiet victory for us, signaling that the holiday meal is truly complete. It’s not just a condiment; it’s a cornerstone of our family’s holiday tradition, and honestly, the reason we fight over the last few tablespoons.
Why You’ll Love This Easy Turkey Gravy Recipes
You’ll adore this gravy because it truly makes the most of your roasted turkey’s pan drippings, ensuring deep, authentic flavor that can’t be replicated. It’s incredibly forgiving, designed to be lump-free, even for novice gravy makers, thanks to a few clever techniques. This recipe is also wonderfully adaptable, allowing you to adjust thickness and seasoning to perfectly suit your family’s preferences. Plus, it transforms a simple side dish into a luxurious experience, making every component on your plate taste even better.
Behind the Recipe
Gravy can feel intimidating, but it really boils down to a few key steps. What I’ve learned over the years is that the secret to a truly spectacular gravy starts long before you even touch a whisk: it’s about good pan drippings. Don’t be afraid to scrape up all those browned bits (the fond!) from the bottom of your roasting pan after the turkey comes out – that’s where a huge amount of flavor lives. Deglazing with a splash of wine or stock before you even start the roux can make a world of difference. The biggest trip-up I see is impatience with the roux, either not cooking the flour long enough (which can leave a raw flour taste) or adding cold liquid too quickly, which leads to lumps. A constant, gentle whisking is your best friend here. And finally, don’t be shy with the seasoning. Gravy needs to stand up to all the other bold flavors on your plate, so taste as you go and adjust. A little splash of cream or a knob of butter at the end can add an extra layer of richness and shine.
Shopping Tips
– Fats & Oils: You’ll likely use the rendered turkey fat from the roasting pan, but it’s always good to have unsalted butter on hand. It helps create a beautiful roux if your drippings are a bit lean or if you need to add more fat.
– Baking Basics: All-purpose flour is the classic choice for thickening. For a gluten-free option, look for a good quality gluten-free all-purpose flour blend or cornstarch, which will need to be made into a slurry.
– Canned Goods: High-quality chicken or turkey stock is crucial. Opt for low-sodium varieties so you can control the seasoning yourself, ensuring the gravy isn’t overly salty.
– Spices: Freshly ground black pepper is a must. A pinch of dried sage or thyme can also enhance the turkey flavor, but don’t overdo it – the turkey drippings should be the star.
– Fresh Herbs: If you used fresh herbs in your turkey cavity, having a few sprigs of fresh thyme or rosemary to infuse into the gravy while it simmers can add a lovely aromatic touch.
Prep Ahead Ideas
You can significantly streamline gravy-making on the big day. A week or two before, consider making a batch of homemade turkey stock using necks and giblets, freezing it until needed. The day before, strain your turkey drippings (if you’ve already roasted parts of the turkey or made stock) and store them in the fridge; the fat will separate and solidify, making it easy to skim. You can also measure out your flour and have your stock ready to go, removing any last-minute measuring stress.
Time-Saving Tricks
If you’re short on time or drippings, use high-quality store-bought turkey or chicken stock as your base, fortifying it with a bouillon cube or two for extra depth. For a super-fast, lump-free method, instead of a roux, you can thicken your gravy with a cornstarch slurry (equal parts cornstarch and cold water, whisked until smooth) added to simmering stock and drippings, whisking constantly until thickened. While slowing down to properly brown your roux adds depth, sometimes speed is necessary, and a cornstarch slurry gets you there quickly without sacrificing too much quality.
Common Mistakes
The most common mistake by far is not whisking constantly, leading to lumpy gravy. To fix this, if it’s not too far gone, try whisking vigorously off the heat, or for stubborn lumps, pass the gravy through a fine-mesh sieve. Another pitfall is bland gravy – remember, gravy needs bold seasoning. Always taste and adjust with salt, pepper, and perhaps a touch of poultry seasoning or a splash of white wine. Over-salting is also a risk, so season incrementally. If you do over-salt, a few drops of lemon juice or a small amount of plain mashed potato or a raw potato slice simmered in the gravy for a few minutes can sometimes help absorb excess salt.
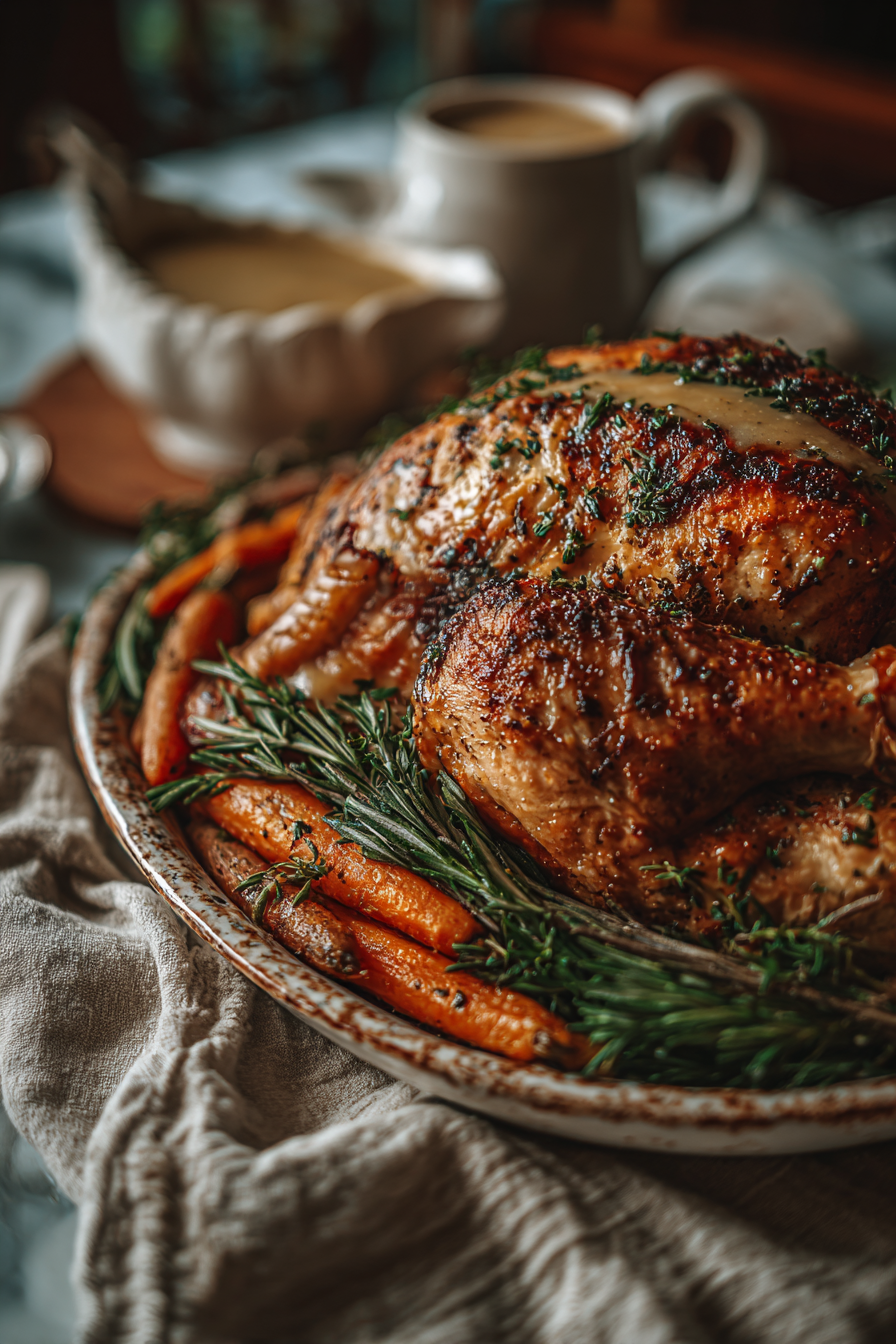
What to Serve It With
This gravy is the perfect companion to your roasted turkey, of course! But its uses don’t stop there. It’s absolutely essential for mashed potatoes, stuffing, and even green bean casserole. Don’t forget about day-after turkey sandwiches or open-faced hot turkey sandwiches with plenty of gravy.
Tips & Mistakes
Storage Tips
Store in airtight containers in the fridge. It reheats beautifully, but if you sneak a bite cold straight from the container, it still works.
Variations and Substitutions
For a gluten-free version, simply swap the all-purpose flour for an equal amount of gluten-free flour blend, or use a cornstarch slurry (2 tablespoons cornstarch mixed with 2 tablespoons cold water for every 2 cups of liquid) added at the end. For a richer, dairy-forward gravy, stir in a tablespoon of heavy cream or a pat of butter right before serving. You can also infuse the gravy with fresh herbs like thyme or rosemary sprigs during the simmering process, removing them before serving. If you don’t have enough turkey drippings, supplement with good quality chicken or vegetable stock and a tablespoon or two of butter or oil to make your roux.