
Delish Chocolate Peanut Butter Sandwich Cookies
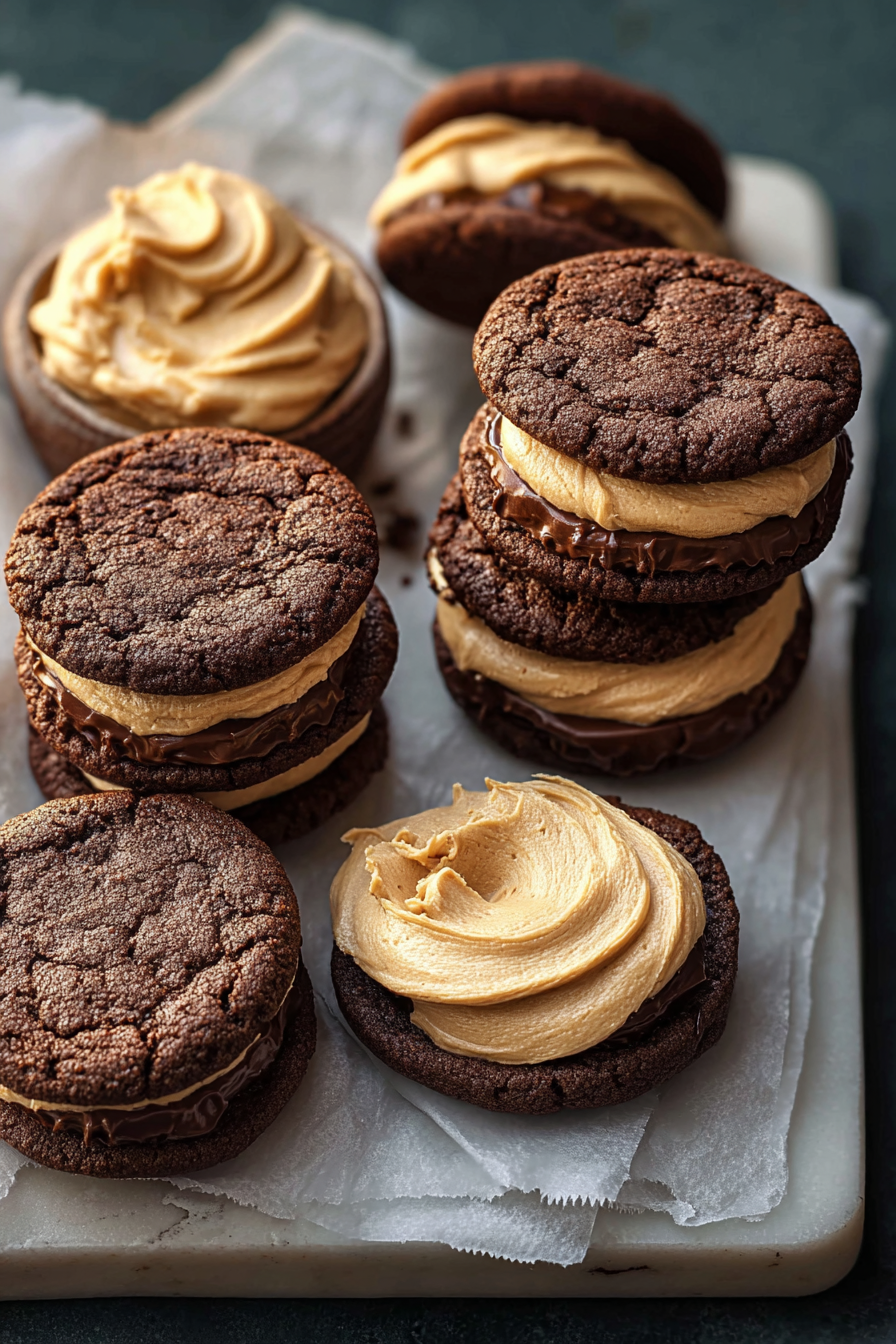
These sandwich cookies are everything I want in a dessert: deep, tender chocolate biscuits that give way to a pillowy, slightly salty peanut butter filling. They’re familiar and comforting but elevated by the contrast of textures — a little snap at the edge, a soft center, and that perfect interplay between cocoa bitterness and nutty sweetness. If you love classic flavors done with a little finesse, these are worth the oven time.
My husband declared these “official weekend cookies” within the first batch — the kind of endorsement that guarantees they’ll be made every few weeks. Our kiddo loves the ritual of “matching” two cookies together and smooshing in just the right amount of filling, which sends them from nice to perfect. They’ve become the cookie I bring to neighbors, the treat I stash in the freezer for surprise guests, and the recipe my mother asks for when she wants something a bit nostalgic but better than from a box.
Why You’ll Love This Delish Chocolate Peanut Butter Sandwich Cookies
– Deep cocoa flavor without tasting flat — the dough balances cocoa and brown sugar for a nuanced chocolate note.
– A creamy, lightly salted peanut butter filling that isn’t too sweet, so each bite feels balanced instead of cloying.
– Texture contrast: crisp edges, tender centers, and a smooth filling, so every bite feels intentional.
– Kid-friendly to assemble (let them press the sandwiches together) but elegant enough to serve at a casual dinner party.
Behind the Recipe
This recipe grew out of chasing the ideal cookie structure: one that bakes up thin enough to get a crisp edge but stays soft in the middle so the sandwich doesn’t feel dense. Key lessons were about chilling — briefly resting the dough helps control spread — and about tempering the filling’s sweetness so the peanut butter shines rather than gets buried. I also learned that swapping a bit of butter for a touch of neutral oil can improve chewiness on busy baking days. Little touches—like a quick press to flatten dough balls for even baking and sprinkling a tiny pinch of flaky salt on the filling—make it feel homemade and intentional.
Shopping Tips
– Baking Basics (Flour/Sugar/Leaveners): Use all-purpose flour and measure by spooning into the cup or weighing — too much flour makes dry cookies. Fresh baking powder/soda matters; if it’s old, the cookies won’t lift properly.
– Fats & Oils: Salted vs. unsalted butter affects final seasoning; I prefer unsalted so I can control salt levels, but salted works in a pinch.
– Chocolate: Pick a good-quality cocoa powder (Dutch-processed if you like a rounder, darker flavor). Avoid cheap “cocoa blends” that sometimes include fillers.
– Nuts & Seeds: For the filling, creamy, natural peanut butter gives the cleanest nut flavor; if you choose a sugar-sweetened commercial brand, cut back slightly on added sugar in the filling.
– Eggs: Use room-temperature eggs for better incorporation and a more even crumb; cold eggs can make the dough tough or uneven.
– Sweeteners: Brown sugar gives chew and depth; if substituting white sugar, expect a slightly crisper, less complex cookie.
Prep Ahead Ideas
– Make the dough a day or two ahead and keep it wrapped in the fridge; this actually improves flavor as the ingredients meld.
– Prepare the peanut butter filling up to 3 days ahead and store in an airtight container in the fridge; bring it to room temperature before spreading.
– Pre-scoop dough onto a sheet and freeze the portions on a tray, then transfer to a bag—bake straight from frozen, adding a minute or two to bake time.
– Store prepped components in airtight containers: dough 48–72 hours, filling up to 3 days; freeze baked sandwiches for up to 1 month.
Time-Saving Tricks
– Use a cookie scoop to portion dough quickly and consistently; it cuts rolling time and produces even bakes.
– If you don’t want to make a filling from scratch, stir a couple tablespoons of powdered sugar into a jar of smooth peanut butter to thicken it, then adjust salt to taste.
– Keep mise en place: measure dry ingredients into one bowl and wet into another so mixing is fast and foolproof.
– Bake on two sheets at once by rotating pans halfway through; just watch for color changes at the edges.
Common Mistakes
– Overbaking: they look slightly underdone at the center when you take them out — they’ll finish setting as they cool. I once left them five extra minutes and lost the tender center; don’t do that.
– Too much flour from careless scooping: dough will be stiff and dry; lighten up and sift if necessary.
– Skipping the chill step: dough that isn’t chilled can spread too thin and lose its tender middle — a brief rest is worth the wait.
– Filling that’s too runny: if your peanut butter is very oily, fold in a touch of powdered sugar or cornstarch to stabilize it.
What to Serve It With
These pair beautifully with a cold glass of milk, a robust coffee, or a scoop of vanilla ice cream for an adult twist. For a party, arrange them on a platter with fresh fruit and a bowl of flaky sea salt so guests can finish to taste.
Tips & Mistakes
– Toast the peanut butter briefly in a warm pan to deepen flavor, but don’t let it scorch.
– If your cookies spread too much, chill the dough balls for 15–30 minutes before baking.
– Warm filling spreads more easily; if it’s too stiff from refrigeration, let it sit at room temperature for 15–20 minutes.
Storage Tips
Store in airtight containers in the fridge. It reheats beautifully, but if you sneak a bite cold straight from the container, it still works.
Variations and Substitutions
– Swap peanut butter for almond or sunflower seed butter for nut-free or different-flavor options; note sunflower can be slightly more bitter and may benefit from a touch of honey.
– Use dark cocoa for a richer, slightly bitter chocolate note, or milk cocoa for a milder cookie.
– For a thinner, crisper sandwich, flatten dough balls more before baking; for thicker, more substantial cookies, chill longer and bake slightly less.
– If you prefer less sugar, reduce the filling’s powdered sugar a bit and taste as you go—leaving a little of the peanut butter’s natural saltiness is a nice counterpoint.

Write me the frequently asked questions and answers Delish Chocolate Peanut Butter Sandwich Cookies in the same way as the example below.
Frequently Asked Questions
Delish Chocolate Peanut Butter Sandwich Cookies
Ingredients
Main Ingredients
- 1.5 cups all-purpose flour
- 0.5 cups cocoa powder
- 0.5 teaspoon baking soda
- 0.25 teaspoon salt
- 0.75 cups unsalted butter softened
- 0.75 cups granulated sugar
- 0.75 cups packed brown sugar
- 1 large egg
- 1 teaspoon vanilla extract
- 1 cup creamy peanut butter
- 0.5 cups powdered sugar
Instructions
Preparation Steps
- Preheat your oven to 350°F (175°C). In a bowl, mix together the flour, cocoa powder, baking soda, and salt. Set this dry mixture aside for later.
- In another bowl, beat the softened butter, granulated sugar, and brown sugar together until smooth and creamy. Then, add in the egg and vanilla extract, continuing to mix until everything is well combined.
- Gradually add the dry ingredients to the wet mixture, stirring until just incorporated. You should have a nice, thick dough at this point.
- Scoop tablespoon-sized balls of dough onto a baking sheet lined with parchment paper, spacing them a few inches apart. Bake for about 10 minutes or until the edges are set.
- Let the cookies cool for a few minutes on the baking sheet before transferring them to a wire rack to cool completely.
- While the cookies are cooling, prepare the peanut butter filling by mixing the peanut butter and powdered sugar together until smooth.
- Once the cookies are completely cool, spread a generous amount of the peanut butter filling on the flat side of one cookie and then top it with another cookie, flat side down, to make a sandwich.
- Repeat this process until all cookies have been filled. Enjoy your delicious treats!