
Easy Orange Bars Recipe
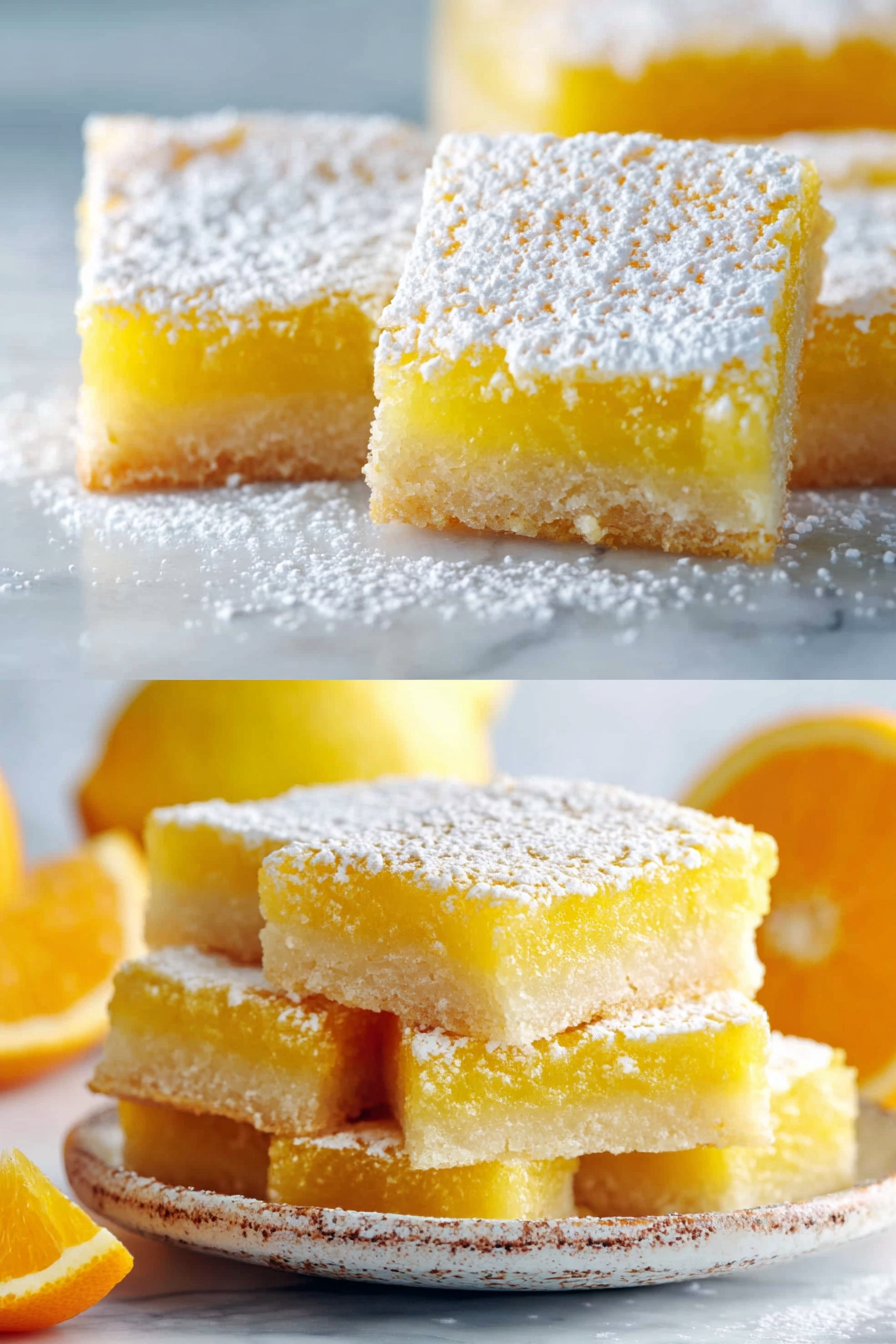
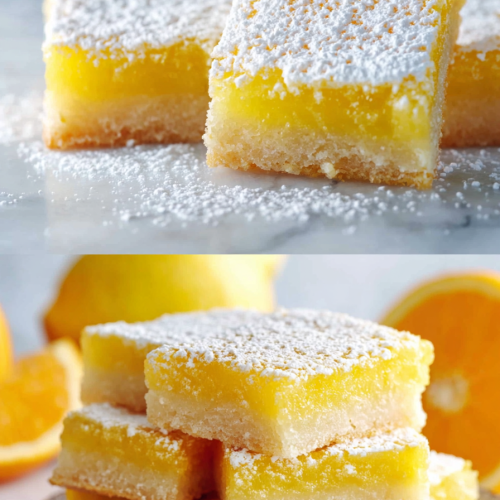
These orange bars are a sun-bright dessert: a tender, buttery base that gives way to a soft, citrus-scented cake and a glossy orange glaze that’s just the right balance of sweet and tangy. They taste like spring in a square—clean orange flavor without being cloying, and they slice into pretty little pieces that are perfect for a weeknight treat or a potluck offering.
My husband calls these our “sunshine squares” and asks for them whenever he wants something that feels both homemade and a little fancy. Our kiddo favors the edges, which are perfectly caramelized and practically a dessert all their own. They’ve become the thing I bring to book club and to low-key weekend breakfasts; once you bake them a couple of times you’ll find your own favorite level of glaze and that one pan lasts maybe two days in our house.
Why You’ll Love This Easy Orange Bars Recipe
– Bright, fresh orange flavor without complicated techniques.
– Buttery, tender crumb that holds up well for slicing and sharing.
– A glossy glaze that adds a pop of citrus and pretty presentation with minimal effort.
– Flexible: they’re equally lovely for afternoon tea, a dessert plate, or a packed lunch treat.
Behind the Recipe
These bars are a balance of textures: a slightly crisp edge, a soft center, and a shiny glaze that soaks in just enough to flavor without sogginess. I learned early on that zest is everything here—fresh zest lifts the whole thing, and bottled flavor just doesn’t compete. Another lesson: don’t overwork the batter; keep mixing gentle to preserve tenderness. Finally, the glaze is forgiving—start thicker and thin with a teaspoon of juice until it looks right, rather than the other way around.
Shopping Tips
– Baking Basics: Choose a reliable all-purpose flour and check your baking powder/soda dates; stale leaveners are a common cause of flat bars.
– Sugar: Granulated sugar works for the crumb while a bit of powdered sugar in the glaze keeps it silky—buy a small bag if you don’t bake often.
– Fats & Oils: Use good-quality unsalted butter for best flavor; if using salted, reduce any added salt elsewhere.
– Citrus: Look for firm, glossy-skinned navel or blood oranges if you can find them; avoid fruit that feels soft or has dry pith.
– Eggs: Room-temperature eggs blend more evenly into batter—take them out of the fridge a bit before baking.
Prep Ahead Ideas
– Zest the oranges and store the zest in an airtight container in the fridge up to a day ahead; juice can be squeezed and kept separately.
– You can assemble the base and refrigerate it (covered) for a day before baking; this helps when you’re short on time the day you want to serve.
– Make the glaze a day ahead and keep it covered in the fridge; bring it to room temperature and stir before glazing.
Time-Saving Tricks
– Line the pan with parchment with an overhang so you can lift the bars out instead of scraping and hacking them from the pan.
– Measure dry ingredients into a bowl the night before; keep cold butter in chunks so it mixes quickly without warming.
– Do your zesting and juicing while the oven preheats—small tasks like that shave minutes and keep momentum.
Common Mistakes
– Overbaking: I once walked away and let the edges turn too brown; the center should be set but still tender. If it’s cracked and deeply browned it’s overdone.
– Too-thin glaze: adding too much juice makes the topping runny and soggy. Start with less liquid and add a little at a time.
– Skimping on zest: using only extract results in a flat orange note. Fresh zest gives essential aromatic oils that define the flavor.
What to Serve It With
These bars are lovely with a simple cup of coffee or a bright pot of tea. For dessert, serve with lightly whipped cream or a scoop of vanilla ice cream and a few fresh berries to echo the citrus. They also pair nicely with a cheese plate—mild, creamy cheeses complement the orange without overpowering it.
Tips & Mistakes
– Use a sharp knife warmed in hot water and wiped dry to get cleaner slices.
– If your bars are slightly underbaked, they often set as they cool—give them a full cooling period before glazing or cutting.
– Don’t over-glaze; a thin, even layer looks best and keeps the texture balanced.
Storage Tips
Store in airtight containers in the fridge. It reheats beautifully, but if you sneak a bite cold straight from the container, it still works. For longer storage, freeze unglazed bars wrapped tightly, then glaze after thawing for best texture.
Variations and Substitutions
– Swap in blood oranges or tangerines for a different citrus profile; note that sweeter fruit may need slightly less glaze.
– For a gluten-free version, use a reliable 1:1 gluten-free flour blend and handle the batter gently—texture will be slightly different but still very enjoyable.
– Add a handful of finely chopped nuts to the crumb for crunch, or a teaspoon of vanilla along with the zest if you like a deeper flavor.
– If you’re short on fresh oranges, a mix of fresh zest and a touch of orange extract can be used, but fresh juice and zest give the brightest result.
Write me the frequently asked questions and answers Easy Orange Bars Recipe in the same way as the example below.
Frequently Asked Questions
Easy Orange Bars Recipe
Ingredients
Main Ingredients
- 1 cup all-purpose flour
- 1 cup granulated sugar
- 0.5 cup butter, melted Make sure to let it cool slightly before mixing.
- 3 large eggs Fresh eggs work best!
- 0.5 cup fresh orange juice Use freshly squeezed for the best flavor.
- 1 tbsp orange zest This adds extra zing!
- 0.5 tsp baking powder
Instructions
Preparation Steps
- Start by preheating your oven to 350°F (175°C). Grease a 9x13 inch baking dish and set it aside. In a mixing bowl, combine the melted butter and sugar until well blended. Add in the eggs one at a time, mixing thoroughly after each addition.
- Next, stir in the fresh orange juice and zest. In another bowl, whisk together the flour and baking powder, then gradually add this mixture to the wet ingredients. Stir until just combined, being careful not to overmix.
- Pour the batter into the prepared baking dish and smooth the top with a spatula. Bake in the preheated oven for about 25 minutes, or until a toothpick inserted in the center comes out clean.
- Once baked, let the bars cool in the pan before slicing them into squares. Enjoy your delightful orange bars with family and friends!