
Easy Butterfinger Fudge Recipes
If you’re the person who steals all the Butterfingers from the Halloween bowl “for the kids,” this fudge is your destiny. It’s a no-thermometer, 10-minute stovetop (or microwave) situation where creamy peanut butter fudge collides with crunchy, crackly Butterfinger bits. It sets up thick, slices into clean little squares, and tastes like the center of a Butterfinger bar went to finishing school and learned manners.
My husband claims he’s “not a dessert person,” which is adorable until he eats three squares of this right from the fridge and then asks if I can “just make a tiny extra batch” to hide in the freezer. The kids call it candy cake. We brought a pan to a neighbor cookout and I watched grown adults do that casual hover by the dessert table so they could sneak one more piece. It’s become a standing request for road trips and birthdays because it travels like a champ and forgives all my chaotic mom slicing.
Why You’ll Love This Easy Butterfinger Fudge Recipes
– No candy thermometer, no drama. We melt, stir, chill, flex.
– It tastes like a Butterfinger bar married peanut butter fudge and invited crunch to the reception.
– One bowl/pot, one pan, about 10 minutes of effort. The fridge does the rest.
– It slices like a dream for holiday plates, bake sales, or your secret snack drawer.
– Stupidly flexible: stovetop or microwave; chunks big or small; top it with flaky salt if you’re fancy.
How to Make It
Here’s the set-up: line an 8×8-inch pan with parchment so you can lift the whole slab out later. In a medium pot on the lowest heat, add 1 can (14 oz) sweetened condensed milk, 2 cups white chocolate chips, 1 cup peanut butter chips, and 1/2 cup creamy peanut butter. Stir like you mean it—slow and steady—until it’s glossy and smooth. Don’t let it boil. Once melted, pull it off the heat and stir in 1 teaspoon vanilla and a pinch of salt.
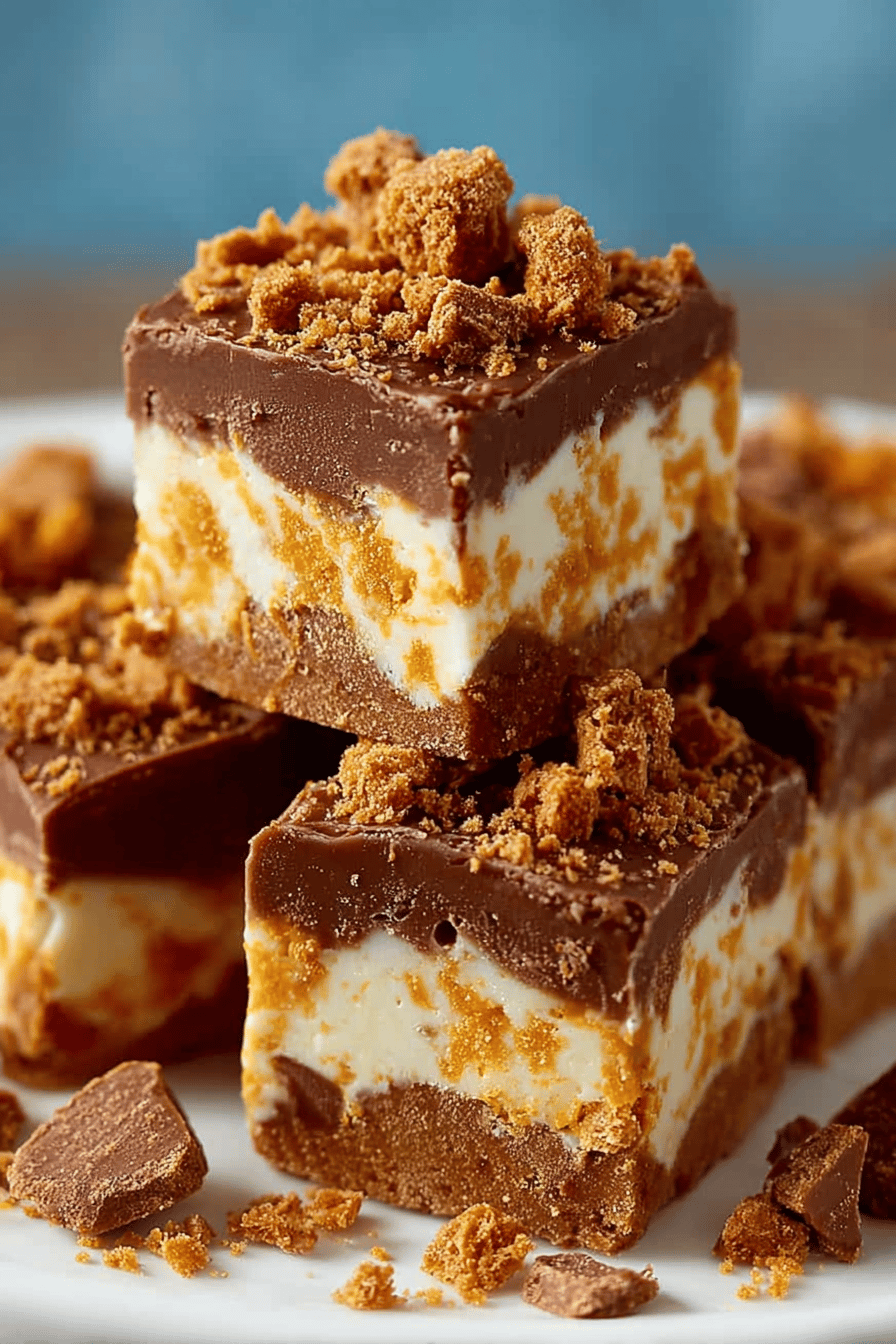
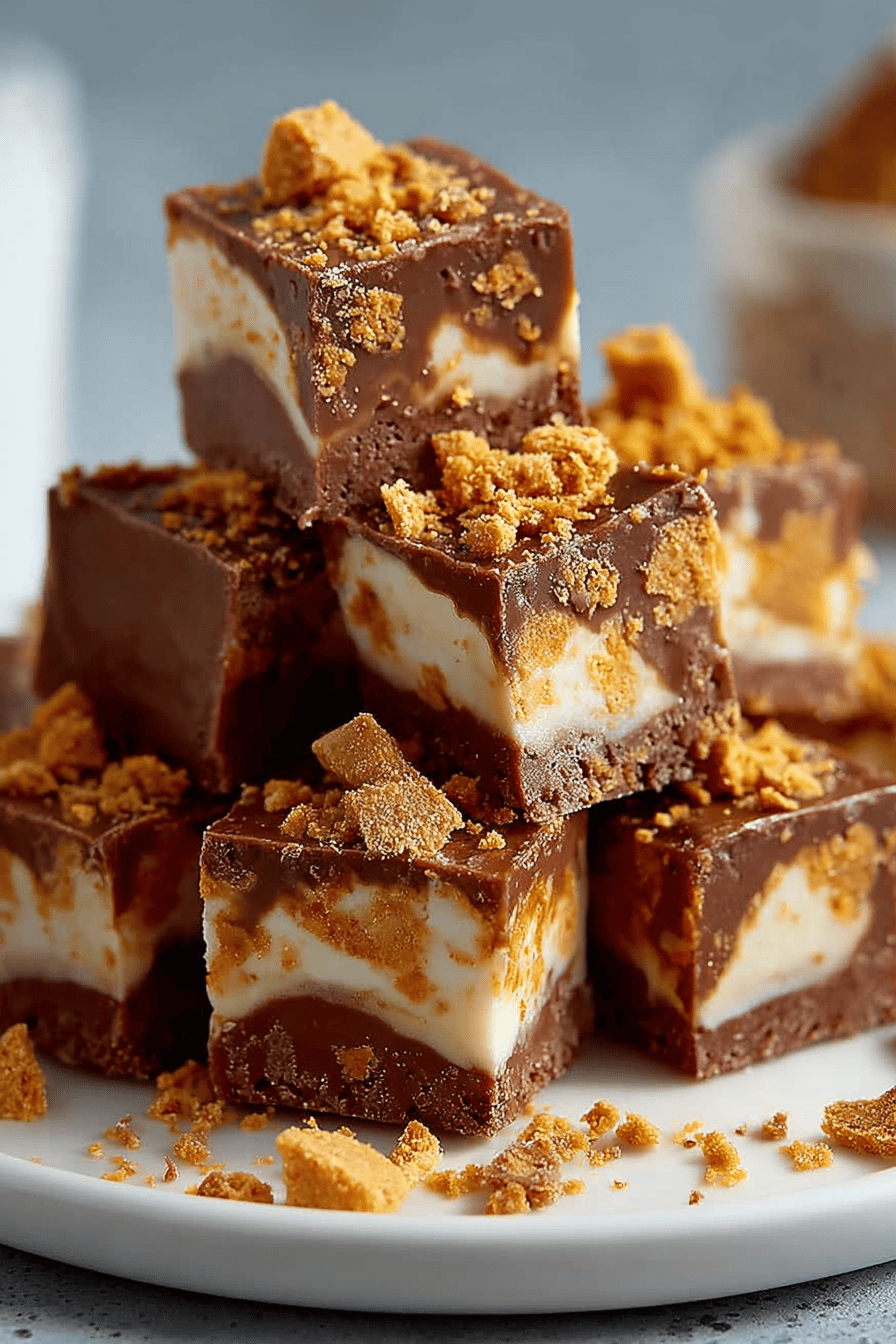
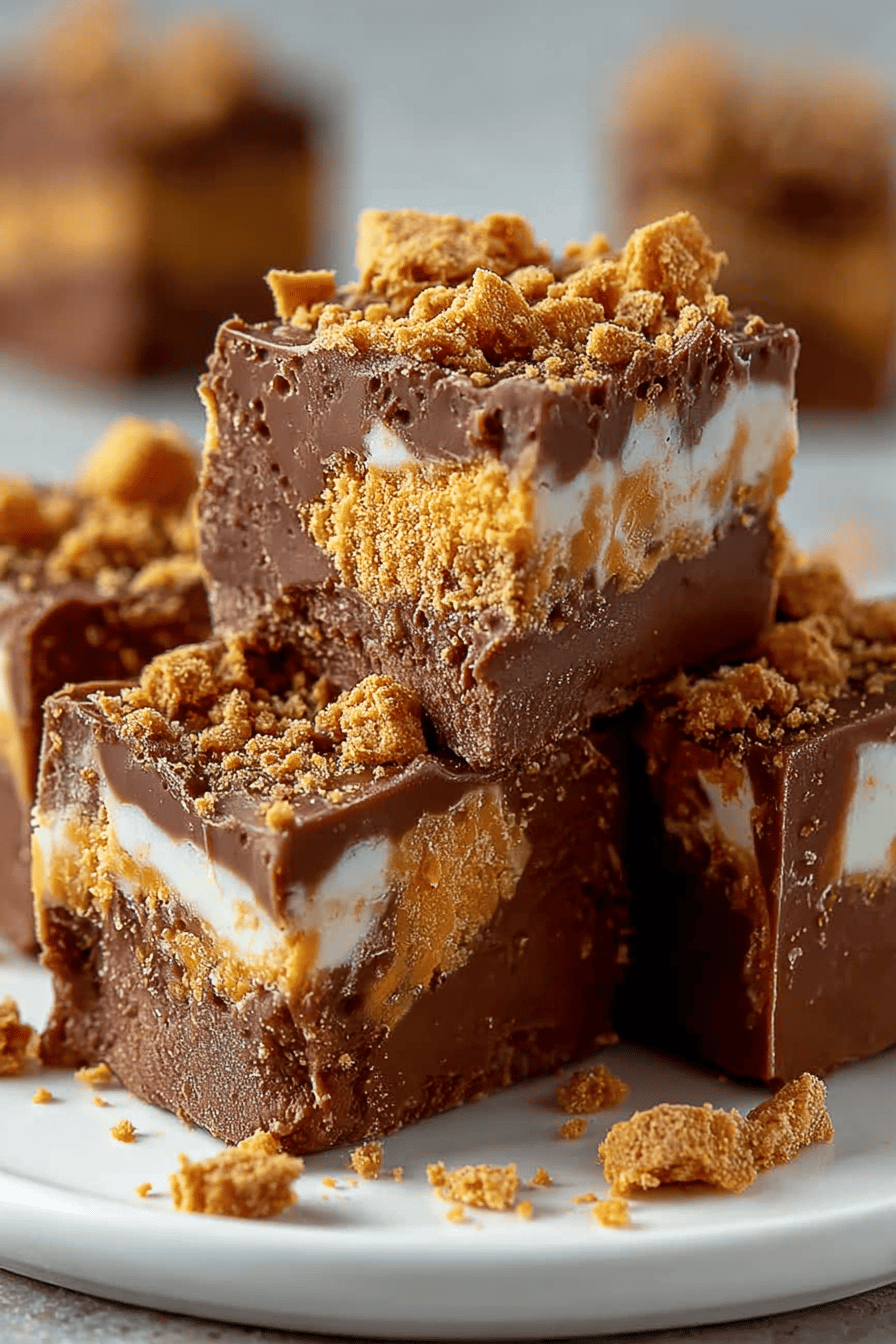
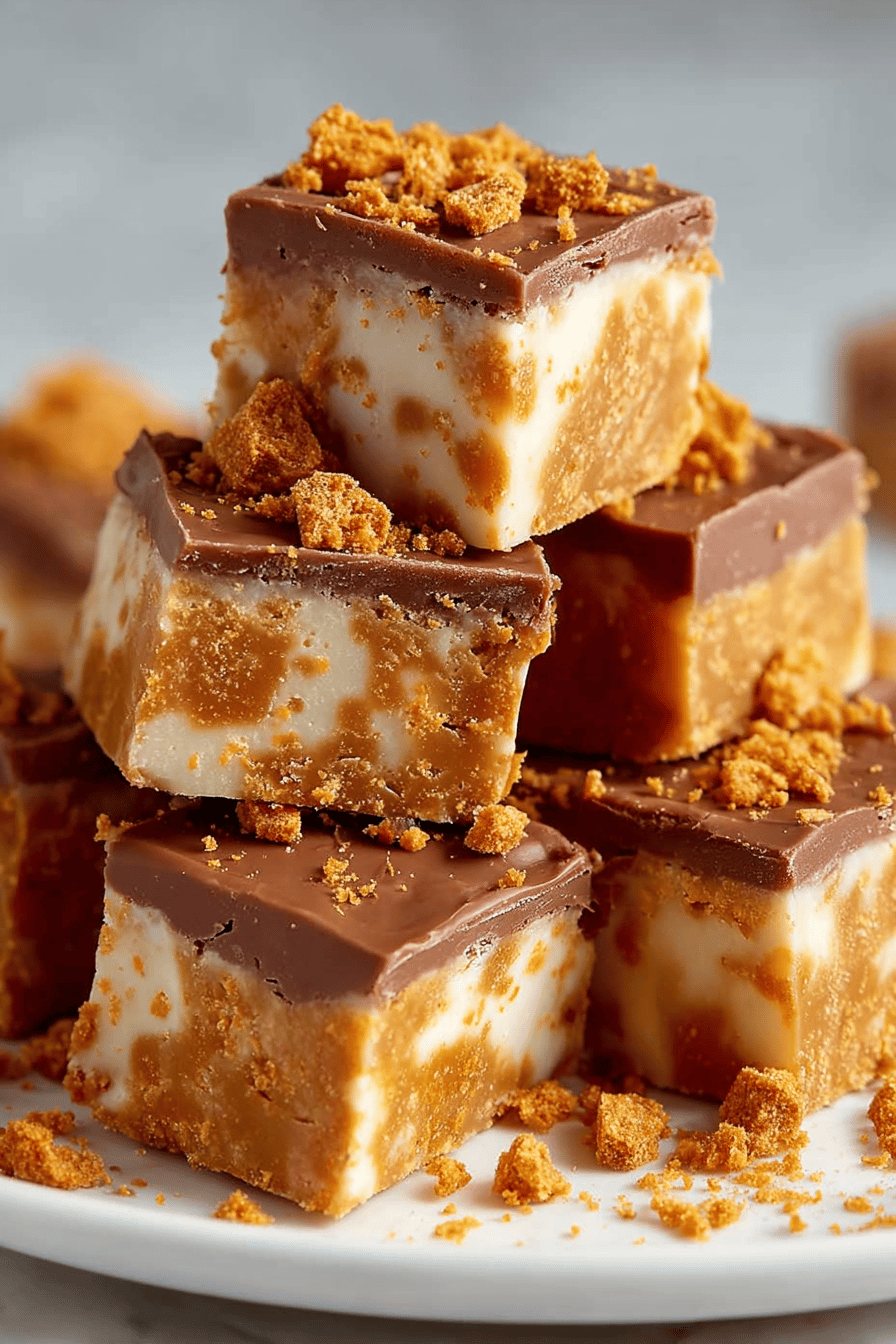
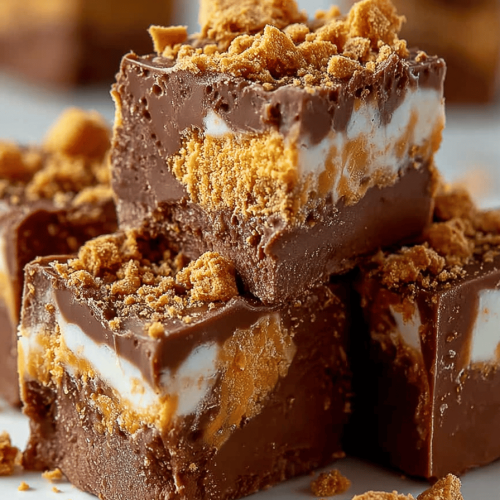
Now for the fun part: chop about 1 1/2 cups Butterfinger bars (use fun-size, full-size, whatever’s in the stash) into chunky rubble. Fold half into the warm fudge so you get little streaks and crunchy pockets. Scrape it into your pan, smooth the top, then sprinkle on the rest of the Butterfinger bits and press them in lightly so they stick. Chill until set, about 2 hours. Lift, slice into small squares, and try not to “just even up the edges” until half the pan disappears. If you want extra drama, hit the top with a little flaky salt before it goes into the fridge.
Ingredient Notes
– Sweetened condensed milk: The backbone. Thick, sticky, does the fudgy magic. Evaporated milk is not the same—don’t swap.
– White chocolate chips: Melt into that creamy base. Use a brand that actually melts; bargain chips can get weird and chalky.
– Peanut butter chips: Boosts that Butterfinger vibe. If you can’t find them, just use more white chips and add an extra spoon of peanut butter.
– Creamy peanut butter: Shelf-stable works best. Natural PB can separate and make the fudge greasy unless you stir it super well.
– Vanilla + salt: Tiny details, big payoff. Salt keeps it from tasting one-note sweet.
– Butterfinger bars: Crush some fine for flavor throughout, leave some chunky for crunch on top. I use about 1 1/2 cups chopped (6–8 fun-size).
– Flaky salt (optional): That sweet-salty finish. Don’t go nuts—just a pinch.
Recipe Steps
1. Line an 8×8-inch pan with parchment, leaving overhang.
2. Combine sweetened condensed milk, white chips, peanut butter chips, and peanut butter in a pot.
3. Warm on low heat, stirring constantly, until smooth and glossy; remove from heat.
4. Stir in vanilla and a pinch of salt.
5. Fold in half the chopped Butterfingers; spread mixture into the pan and smooth.
6. Scatter remaining Butterfingers on top, press gently, chill 2 hours, then slice.
What to Serve It With
– Cold milk or hot coffee (the grown-up move).
– Vanilla ice cream, tucked alongside a warm brownie if you’re going full chaos.
– Salty pretzels or roasted nuts for a sweet-salty snack board.
– A movie night and zero plans.
Tips & Mistakes
– Keep the heat low. If the chips overheat, they seize and the texture turns gritty.
– Line the pan. You’ll thank yourself when you lift out a perfect fudge slab.
– Mix-ins go in off heat. Melt first, then add candy, or it’ll melt into nothing.
– Chop the bars unevenly. You want dust for flavor, pebbles for crunch.
– If microwaving, zap in 20–30 second bursts, stirring each time, until smooth.
Storage Tips
Pop the squares in an airtight container with parchment between layers. Fridge: 1 week easy. Freezer: up to 2 months—thaw in the fridge so the top doesn’t sweat. Straight from the fridge it’s firmer and extra fudgy; from the counter it’s softer and creamier. Breakfast squares? I’m not your boss. Zero judgment.
Variations and Substitutions
– Swap the chips: Try all white chips, or half white + half milk chocolate for a swirl. Dark chocolate makes it richer (and less sweet).
– No peanut butter chips? Use 3 cups total white chips and bump peanut butter to 3/4 cup.
– Add-ins: Pretzels, roasted peanuts, or a ripple of caramel on top before chilling.
– Gluten-free: Most Butterfingers in the U.S. are GF, but check the wrapper—formulas change.
– Dairy-free: Tricky. Dairy-free condensed milk + dairy-free chips can work, but texture is softer.
– Too sweet? Add a little extra salt, use dark chocolate, or drizzle with bittersweet chocolate.
Frequently Asked Questions
Easy Butterfinger Fudge Recipes
Ingredients
Main Ingredients
- 3 cups semisweet chocolate chips
- 14 oz sweetened condensed milk
- 2 tbsp unsalted butter
- 1 tsp vanilla extract
- 0.25 tsp fine salt
- 1.5 cups Butterfinger candy bars, chopped divided
Instructions
Preparation Steps
- Line an 8x8 inch pan with parchment paper, leaving overhang for easy lifting; lightly grease the parchment.
- In a medium saucepan over low heat, combine chocolate chips, sweetened condensed milk, and butter. Stir constantly until melted and smooth, 3 to 5 minutes.
- Remove from heat and stir in vanilla and salt until fully incorporated.
- Fold in 1.0 cups of the chopped Butterfinger, then spread the mixture evenly into the prepared pan.
- Sprinkle the remaining 0.5 cups Butterfinger over the top and gently press to adhere.
- Chill until set, about 120 minutes. Lift out using the parchment, cut into 25 squares, and serve.