
Easy Hasselback Sweet Potatoes Recipe
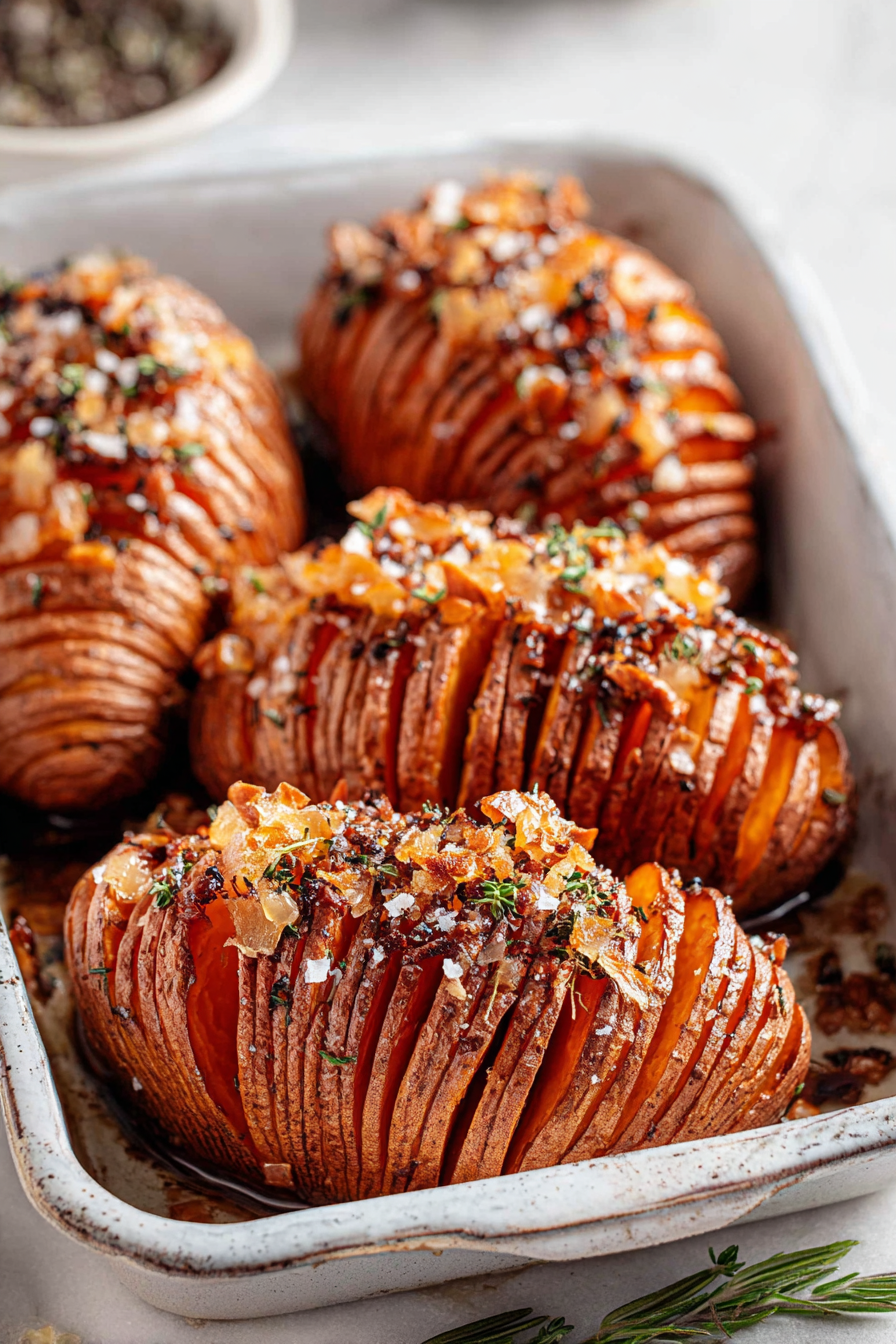
There’s something enchanting about sweet potatoes, especially when they’re prepared as Hasselback-style. These beauties are sliced thinly, creating plenty of nooks and crannies for flavor to seep into, resulting in a dish that’s both visually stunning and deliciously satisfying. Roasted until tender, they’re crispy on the outside and buttery soft on the inside, making them a wonderful side dish or even a main attraction on your plate. My family adores this recipe, and it has quickly become a staple in our household for gatherings and cozy dinners alike.
I remember one mid-autumn evening, my husband mused out loud about how we could spice up our typical sweet potato dish. I decided that night to give Hasselback sweet potatoes a try, and oh, what a revelation it was! We gathered around the table, and as the fragrant aroma filled our home, my children squealed in delight, eager to dig in. Each slice revealed crispy edges that contrasted beautifully with the tender flesh, each bite bursting with warmth. It felt like we were wrapping ourselves in a cozy blanket of flavor, and we’ve been enjoying them regularly ever since.
Why You’ll Love This Easy Hasselback Sweet Potatoes Recipe
There are so many reasons to fall for this recipe! First, it’s incredibly versatile; you can dress it up with various toppings or keep it simple with olive oil and salt. Second, the presentation is sure to impress anyone at your table—those gorgeous slices create a picture-perfect feast. Lastly, it’s a healthy option, packed with nutrients and fiber, making it not just a treat for the taste buds but for your wellness too.
Behind the Recipe
This recipe is not only easy to prepare but allows for a whole range of customization. I’ve experimented with various seasonings, from classic garlic and rosemary to zesty lime and chili powder, and each version has its own unique appeal. One thing I’ve learned is that cutting the slits too deep can lead to the sweet potatoes falling apart, so I aim for a gentle touch. A sprinkle of coarse sea salt right before serving elevates the flavor tremendously, giving a nice contrast to the sweet notes of the potato. Little things like this can make your dish truly shine.
Shopping Tips
When selecting sweet potatoes, look for those that are firm, with smooth skins and no blemishes. A medium size is best for even cooking. If you’re feeling adventurous, you can also explore different varieties, like Japanese sweet potatoes, which have a beautifully creamy texture. On a budget, generic brands of olive oil or seasonings are often just as good as their pricier counterparts, but investing in high-quality sea salt or specialty herbs can vastly improve your final dish.
Prep Ahead Ideas
To make your life easier, you can wash and slice the sweet potatoes the day before, storing them in water in the fridge to prevent browning. I find that prepping the seasoning mix in advance really speeds things up on the day of serving. Storing them in airtight containers keeps everything fresh, making weeknight dinners a breeze.
Time-Saving Tricks
For a quicker meal, consider using a food processor to chop the garlic and herbs. I also keep a stash of pre-washed greens in my fridge, which makes for a perfect and quick side salad. Don’t rush the resting time after you take the sweet potatoes out of the oven; letting them sit for a few minutes enhances their flavor and texture.
Common Mistakes
One common pitfall is slicing the sweet potatoes too deeply, leading to mushy bits instead of the desired crispy layers. I once did this and learned to adjust my technique to ensure the slices are well-spaced but not too deep. Additionally, over-enthusiastic seasoning can drown out the natural sweetness of the potato, so I recommend starting with a light hand and adjusting to taste.
What to Serve It With
These Hasselback sweet potatoes pair well with a variety of proteins—think grilled chicken or roasted pork. They also shine alongside a fresh salad or a hearty vegetable medley, making for a well-rounded meal.
Tips & Mistakes
Experimenting with different toppings, like feta or crispy bacon, can create entire new flavor profiles, adding a fun twist to this dish.
Storage Tips
Store in airtight containers in the fridge. It reheats beautifully, but if you sneak a bite cold straight from the container, it still works.
Variations and Substitutions
You can easily swap out regular sweet potatoes for purple or Japanese varieties, each bringing their own unique flavor and texture. I’ve also tried using herbs like thyme in place of rosemary, and both versions were delightful, so feel free to get creative.
Frequently Asked Questions
Creme Brulee Cookies Recipe
Ingredients
Cookie Base
- 0.75 cup unsalted butter softened
- 0.5 cup granulated sugar
- 1 large egg yolk
- 1 tbsp vanilla extract
- 1.5 cup all-purpose flour
- 0.5 tsp baking powder
- 0.25 tsp salt
Brulee Topping
- 0.5 cup brown sugar for topping
- kitchen torch for caramelizing
Instructions
Baking Steps
- Preheat your oven to 350°F (175°C). In a mixing bowl, beat the softened butter and granulated sugar together until light and fluffy. Add the egg yolk and vanilla extract, and mix until well combined.
- In a separate bowl, whisk together the flour, baking powder, and salt. Gradually add the dry ingredients to the butter mixture, mixing until just incorporated.
- Scoop out tablespoon-sized portions of the dough and place them on a lined baking sheet. Flatten them slightly and bake for about 12 minutes, or until the edges are lightly golden.
- Let the cookies cool for a few minutes, then sprinkle brown sugar evenly over the tops. Use a kitchen torch to carefully caramelize the sugar until it forms a crispy crust.
- Allow the caramelized topping to harden for a minute before enjoying your delicious creme brulee cookies!