
Delish Gluten Free Peanut Butter Blossoms
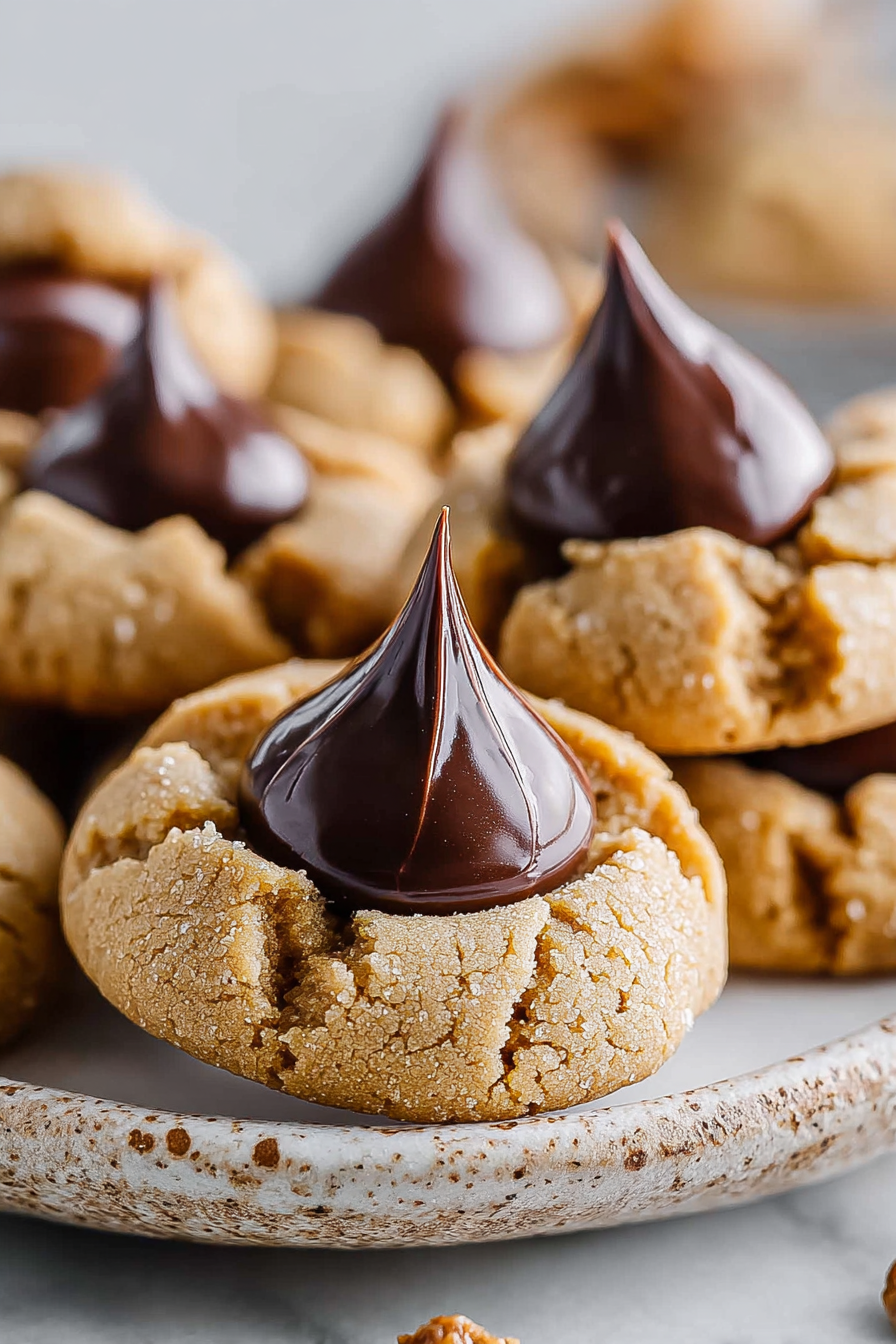
These gluten-free Peanut Butter Blossoms are my go-to holiday cookie: soft, peanut-buttery domes rolled in sugar with a chocolate kiss pressed in while they’re still warm. They feel like the perfect balance of nostalgic and modern — classic flavor with a texture that’s tender without crumbling, and staying reliably gluten-free so everyone at the table can indulge.
My little family fights over the first batch every year. My husband always claims he doesn’t like “fancy” cookies, yet somehow he ends up with three before dinner; our kid insists on helping roll the dough and then gnomishly licks the bowl when I’m not looking. Making these together has become our unofficial weekend ritual — simple enough for my kiddo to participate, but special enough that we all feel proud when the tray comes out of the oven. I love that these cookies land perfectly between a weekday treat and a holiday showstopper.
Why You’ll Love This Delish Gluten Free Peanut Butter Blossoms
– Classic peanut butter flavor with a soft, cakey interior that won’t fall apart — ideal for kids and adults alike.
– Gluten-free without compromise: tender crumb, lightly crackled exterior, and that satisfying chocolate center.
– Fast to mix and very forgiving — great for baking with little hands or for last-minute cookie swaps.
– Freezer-friendly dough and baked cookies mean you can make ahead for parties or unexpected guests.
Behind the Recipe
These cookies started as an experiment to make the classic Peanut Butter Blossom reliably gluten-free and family-friendly. I learned early on that the balance of peanut butter to flour is what builds tenderness — too much flour makes them dry, too little and they spread into flat discs. Rolling in granulated sugar before baking gives a pretty crackle and a slight crunch that contrasts with the soft middle; don’t skip it. Pressing the chocolate kiss in while the cookie is still warm is key — the kiss melts slightly but keeps its shape, creating that iconic look and texture. Also: chilling the dough briefly helps keep the cookies from spreading into pancake shapes, which is a common trap.
Shopping Tips
– Baking Basics (Flour/Sugar/Leaveners): Choose a reliable gluten-free 1:1 flour blend that includes xanthan or guar gum for structure, and use the granulated sugar called for to get that signature crackle.
– Nuts & Seeds: Use a smooth, well-stirred natural peanut butter for the best flavor and texture; avoid runny oil-separated jars unless you measure carefully.
– Chocolate: Pick classic chocolate kisses or small squares; dark or milk works depending on your preference — they both melt nicely into the warm cookie.
– Fats & Oils: If the recipe calls for butter, use unsalted to control seasoning; you can swap for a neutral oil in a pinch but expect a slightly different mouthfeel.
– Eggs: Use large eggs at room temperature so they incorporate smoothly and help the dough bind without overworking.
Prep Ahead Ideas
– Dough can be made a day or two ahead and kept tightly covered in the fridge; this actually improves flavor and reduces spreading.
– Roll the dough into balls and freeze them on a tray; once solid, transfer to a freezer bag — bake from frozen, adding a minute or two to the time.
– Measure dry ingredients into a container or zip-top bag in advance so assembly is quick when you’re ready to bake.
Time-Saving Tricks
– Scoop all the dough into uniform balls before chilling or baking to make the process flow and ensure even baking.
– Use a cookie scoop instead of a spoon for consistent sizes; it speeds up rolling and yields uniform cookies.
– Line baking sheets with parchment so you can transfer trays in and out quickly and avoid scrubbing pans.
– When decorating, unwrap a bunch of chocolate kisses in advance and keep them near the oven so you can press them in immediately after baking.
Common Mistakes
– Overworking the dough: kneading or mixing too long can make cookies tough — stop as soon as ingredients are combined.
– Skipping the chill: if you bake without a short chill, cookies may spread too much and lose their domed shape; a 15–30 minute chill usually helps.
– Pressing the chocolate too soon or too late: press while cookies are warm so the kiss softens but still holds shape; if you wait too long, it won’t adhere.
– Using oil-separated peanut butter without stirring: the texture will be off and cookies can be greasy; stir jars thoroughly before measuring.
What to Serve It With
These are perfect on their own with a cold glass of milk or hot cocoa. They also pair wonderfully with scoops of vanilla or salted caramel ice cream for a playful dessert plate, or alongside other holiday cookies for a nostalgic cookie swap.
Tips & Mistakes
For a crisp edge and tender center, rotate the baking sheet halfway through baking and don’t overcrowd the pan. If cookies come out looking too flat, the remedy is usually a brief chill of the dough and checking your leavening — old baking powder or soda can fail to give the lift you expect.
Storage Tips
Store in airtight containers in the fridge. It reheats beautifully, but if you sneak a bite cold straight from the container, it still works.
Variations and Substitutions
– Crunchy peanut butter will add texture, but it changes the bite; smooth peanut butter gives the classic soft interior.
– For a nut-free option, try sunflower seed butter and sunflower seed butter kisses, but be aware the flavor will shift and may be slightly more bitter.
– Swap some granulated sugar for brown sugar for a deeper, caramelized note, though this will make cookies a bit chewier.
– To cut sweetness, use dark chocolate kisses or 60–70% chocolate squares instead of milk chocolate.
Frequently Asked Questions

Delish Gluten Free Peanut Butter Blossoms
Ingredients
Main Ingredients
- 1 cup peanut butter Creamy or crunchy peanut butter works well.
- 0.5 cup granulated sugar
- 0.5 cup brown sugar Packed.
- 1 large egg
- 1 tsp vanilla extract
- 1 cup gluten-free all-purpose flour Make sure it contains xanthan gum.
- 0.5 tsp baking soda
- 0.25 tsp salt
- 24 pieces chocolate kisses Unwrapped.
Instructions
Preparation Steps
- Start by preheating your oven to 350°F (175°C). In a large mixing bowl, combine the peanut butter, granulated sugar, brown sugar, egg, and vanilla extract. Mix until smooth and well combined. Next, stir in the gluten-free flour, baking soda, and salt until just incorporated.
- Using a tablespoon, scoop out portions of the dough and roll them into balls. Place them on a baking sheet lined with parchment paper, leaving space between each ball. Bake for 8 to 10 minutes or until they’re slightly golden around the edges.
- Immediately after removing them from the oven, gently press a chocolate kiss into the center of each cookie. Let them cool on the baking sheet for a few minutes before transferring to a wire rack to cool completely.